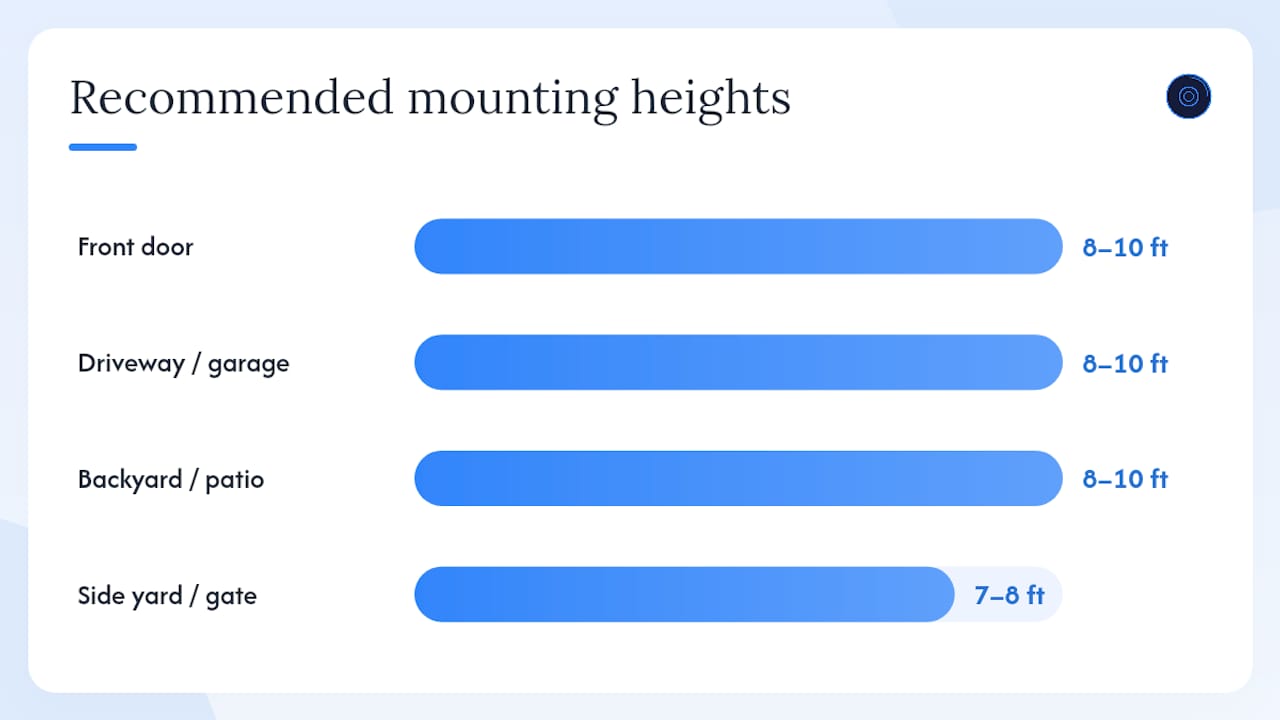
Effective security camera placement starts with six positions: front door, back door, driveway and garage, first-floor windows, side yard gates, and one indoor foyer or stairwell camera. Mount outdoor cameras at 8–10 feet above grade — high enough to resist tampering, low enough to capture facial detail on a 1080p sensor. A video doorbell at roughly 48 inches pairs well with a higher porch camera overhead, giving you both face-level identification and wide-area context at the same entry point. Properties in Manhattan, Brooklyn, Queens, or Staten Island that sit on NYC Landmarks Preservation Commission (LPC)-designated blocks face additional permit requirements before any camera goes on the façade.
- Front door: primary overhead camera at 8–10 ft plus optional video doorbell at ~48 in
- Back door / sliding patio door: angled to cover the full door frame and adjacent patio
- Driveway and garage: wide-angle or floodlight camera capturing the approach and license plates
- First-floor windows: especially those accessible from a porch roof, fence, or fire escape
- Side yard and gates: narrow-field camera at 7–8 ft, paired with motion-sensor lighting
- Indoor foyer or main stairwell: one camera at 7–9 ft covering the interior entry zone
Pro Tip: Cover every likely entry point with at least one dedicated camera before adding wide-area context cameras. A single well-placed camera at a door beats three cameras covering the same open lawn.
Key Takeaways
Effective security camera placement combines the right locations, correct mounting heights, and proper installation hardware — and in NYC, local LPC and surveillance law compliance is part of that equation from the start.
| Point | Details |
|---|---|
| Priority positions | Cover front door, back door, driveway, first-floor windows, side gate, and one indoor foyer camera first. |
| Optimal mounting height | Mount outdoor cameras at 8–10 feet to balance tamper resistance with facial identification quality. |
| Avoid privacy-protected spaces | Never place cameras in bedrooms, bathrooms, or changing areas; disable microphones unless notice requirements are met. |
| LPC permit requirements | NYC landmark façades allow no more than 2 cameras per 25 ft (small buildings) or 3 per 25 ft (large buildings); permits require drawings and cut sheets. |
| YDA Security Systems NYC | Licensed and insured installation across Manhattan, Brooklyn, Queens, and Staten Island, with a one-year warranty and permit documentation support. |
Table of Contents
- Where should you place outdoor security cameras?
- How should you position indoor security cameras?
- Five camera positions most people overlook
- How many cameras do you actually need?
- What camera height, angle, and lens settings actually determine
- Common mistakes that create blind spots and useless footage
- Mounting, power, weatherproofing, and installation best practices
- When should you hire a licensed installer?
- Professional security camera installation from YDA Security Systems NYC
- Sources
- FAQ
Where should you place outdoor security cameras?
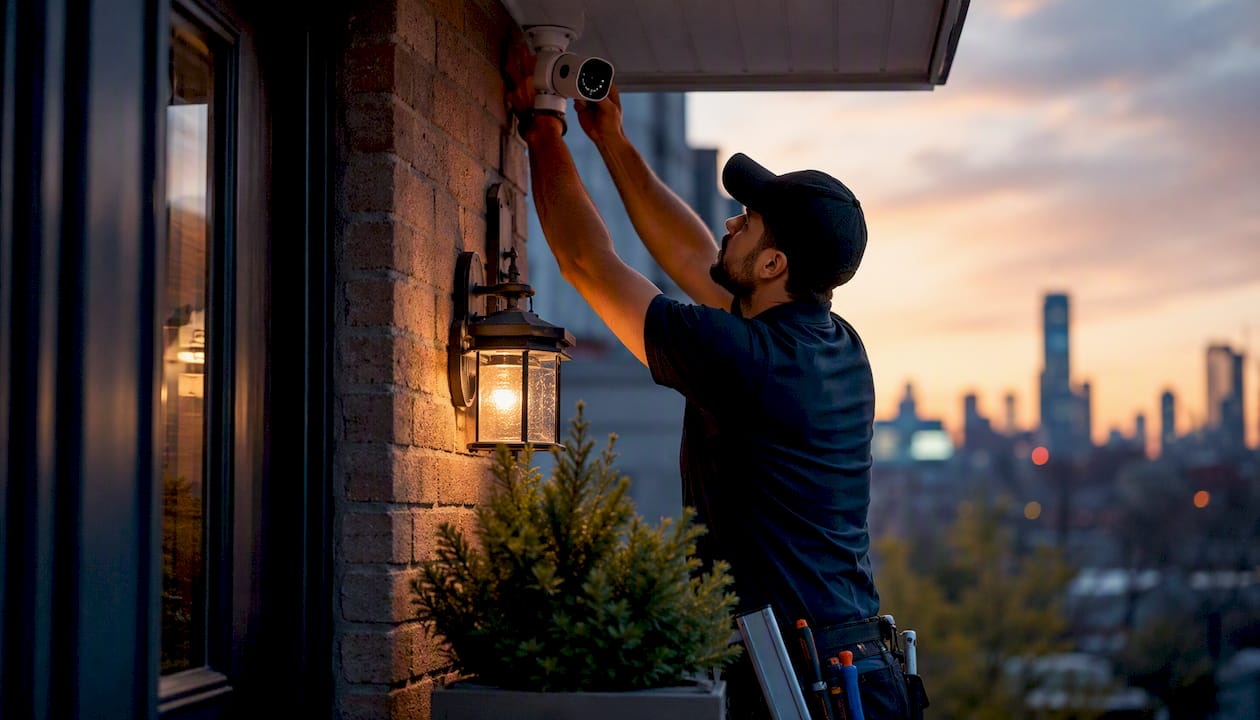
The front door is the highest-priority position in any residential or commercial camera plan. Burglar entry-point surveys consistently identify the front door, first-floor windows, and garage as the most common access points, and visible cameras combined with lighting measurably reduce a property’s appeal as a target. Mount the primary front-door camera under the eave at 8–10 feet, angled slightly downward to capture faces rather than the tops of heads. If direct sunlight hits the lens at sunrise or sunset, choose a camera with HDR or WDR capability to prevent the image from washing out.
The driveway and garage deserve a wide-angle or floodlight-style camera positioned at the same 8–10 foot height, angled to cover both the approach path and the garage door. Tilt the camera slightly toward the driveway entrance so license plates are readable — a detail that proves critical when a vehicle is involved in an incident. Where power is unavailable at the garage eave, a solar-assisted battery camera is a practical alternative, though wired PoE remains the more reliable long-term choice.
Backyard and fence-line cameras protect sliding doors, patio entries, and rear gates. Night-vision cameras generally provide adequate coverage, while spotlight cameras add active deterrence and improve color identification after dark. Security recommends treating back and side entries with the same priority as the front door, since rear approaches often offer more concealment for an intruder.
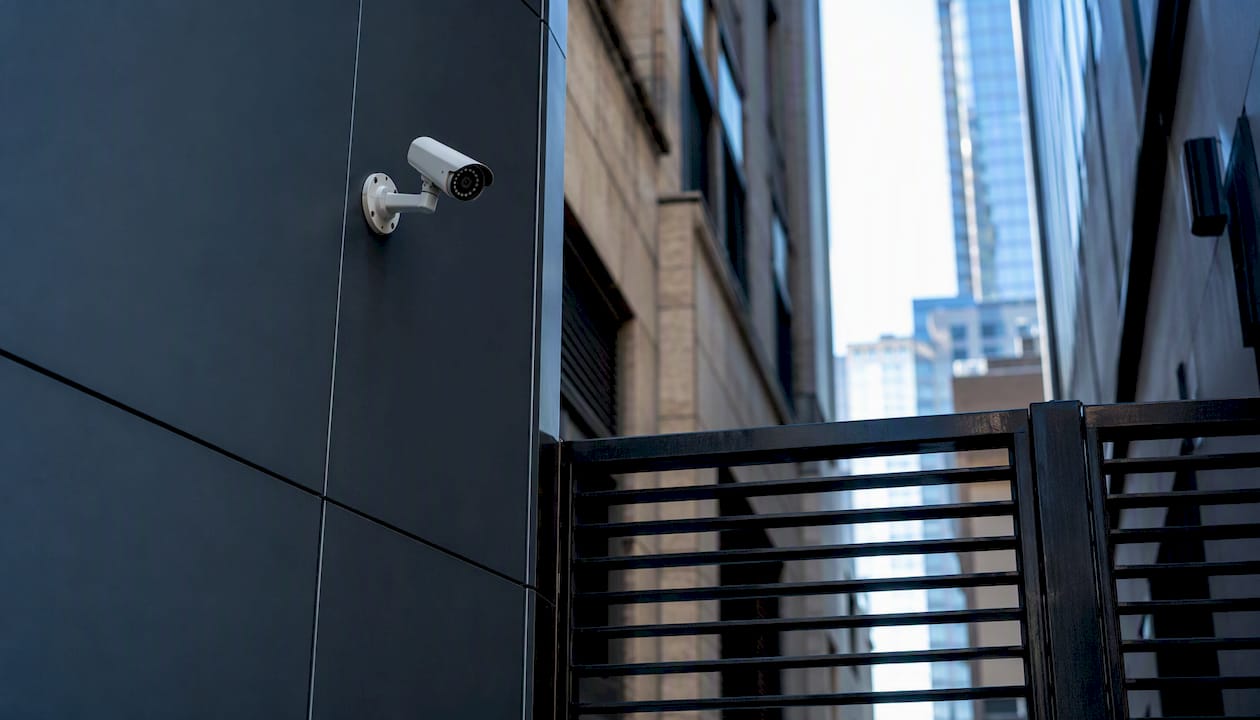
Side yards and narrow alleys are frequently underprotected. A camera mounted at 7–8 feet on the side of the structure, angled toward the gate or alley entrance, closes a gap that many homeowners discover only after reviewing footage of an incident. Avoid pointing side-yard cameras directly at a neighbor’s window or yard — both as a courtesy and to stay within New York’s video surveillance guidelines.
Pro Tip: Before drilling any exterior mount, walk to the planned location with a phone and check WiFi signal strength. A dropped connection at the eave means a wired PoE run or a signal extender — better to know before the camera is mounted.
| Location | Recommended Height | Camera Type | Key Angle Goal |
|---|---|---|---|
| Front door | 8–10 ft | Fixed dome or bullet + doorbell | Face-level ID, full door frame |
| Driveway / garage | 8–10 ft | Wide-angle or floodlight | Approach path and license plates |
| Backyard / patio | 8–10 ft | Night-vision or spotlight | Sliding door and fence line |
| Side yard / gate | 7–8 ft | Narrow-field or battery/solar | Gate entry and alley approach |
How should you position indoor security cameras?
Indoor cameras serve a specific purpose: capturing evidence and situational awareness after an exterior door or window has been breached. They are not a substitute for exterior coverage. The most productive indoor positions are the entry foyer, the main stairwell, and an open-plan living area that connects directly to the front entrance. Mount these cameras at 7–9 feet, angled to cover the full width of the space rather than a single narrow corridor.
Bedrooms, bathrooms, and any changing or locker area are off-limits. New York law prohibits cameras in spaces where people have a reasonable expectation of privacy, and placing one in those areas creates serious legal exposure regardless of who owns the property. For commercial properties — gyms, hotels, retail back offices — this boundary is especially important to document and communicate to staff.
Audio recording deserves separate attention. Many off-the-shelf cameras ship with microphones enabled by default, and recording audio without consent raises eavesdropping liability under New York law. Disable the microphone on any indoor camera unless you have confirmed compliance with applicable notice requirements, and consider posting conspicuous signage where cameras are in use in a commercial setting.
Fewer, better-placed indoor cameras consistently outperform a large number of low-value placements. One camera covering the foyer and one covering the stairwell typically provide more usable footage than five cameras scattered through secondary rooms.
Pro Tip: Position one indoor camera to capture the interior face of your most vulnerable exterior door. If a forced entry occurs, that angle provides supplemental identification and documents the breach point for insurance and law enforcement.
Five camera positions most people overlook
Even well-planned systems tend to leave the same gaps. These five spots appear repeatedly in post-incident footage reviews.
- Side yard midpoints and narrow alleys. A gate camera at the entrance does not cover someone who scales the fence midway along the run. A second camera aimed down the alley length closes that gap.
- Above the garage at roofline height. A low-profile camera mounted at the roofline above the garage door captures anyone stepping from a roof or elevated surface onto a porch or second-floor entry — a route that ground-level cameras miss entirely.
- Second-floor windows with external approach paths. Windows accessible from a porch roof, fire escape, or mature tree are real entry points. A camera covering the exterior approach to those windows is worth adding before an incident occurs.
- Under-porch overhangs and eave gaps near doors. A small gap in coverage near a side door or under a deep overhang can leave an intruder completely out of frame. A compact wide-angle camera tucked into the overhang fills that blind spot.
- Parcel drop zones and side-porch blind corners. Package theft is among the most common property crimes in NYC. A dedicated camera covering the delivery area — separate from the main door camera — captures theft that happens just outside the primary camera’s field of view.
Pro Tip: Review your existing footage after a minor incident (a delivery, a visitor) and trace the path they walked. Any segment where the person disappears from frame is a blind spot worth addressing.
How many cameras do you actually need?
That count is a starting point, not a ceiling. Understanding which areas criminals most commonly target — front doors, first-floor windows, and garages — helps prioritize where to concentrate coverage before expanding to secondary zones.
The right number depends on the property footprint, the number of entry points, and whether the goal is deterrence, identification, or both.
- Small house (2–3 entry points): 4–5 cameras covering front door, back door, driveway, and one side approach
- Townhouse or row home: 5–6 cameras, with additional coverage for shared alley access, roof-deck entry, and any basement-level door
- Small retail storefront: 6–8 cameras covering the entrance, sales floor, stockroom door, rear exit, and exterior approach; a commercial security camera setup for a retail environment typically also includes a camera covering the point-of-sale area
For any location where identification quality matters most — a primary entrance, a cash register, a server room door — consider two cameras: one wide-angle for context and one narrower-field camera for close-range ID. Single cameras attempting to do both jobs often do neither well.
| Property Type | Recommended Camera Count | Primary Coverage Goals |
|---|---|---|
| Small house | 4–5 | Front/back doors, driveway, side gate |
| Townhouse / row home | 5–6 | All entries, alley access, roof deck |
| Small retail storefront | 6–8 | Entrance, sales floor, rear exit, POS area |
| Small office suite | 4–6 | Reception, server room, rear exit, parking |
What camera height, angle, and lens settings actually determine
Mounting height is the single variable that most directly affects footage usefulness. The 8–10 foot outdoor standard balances two competing needs: keeping the camera out of easy reach while preserving enough facial pixel density for identification. Below 7 feet, a camera is vulnerable to tampering and redirection. Above 10–12 feet, a 1080p sensor may not deliver enough facial pixels at distance to support a positive ID — a limitation that 2K or 4K sensors extend meaningfully, since higher resolution sensors maintain identification quality at greater distances.
Downward tilt should fall between 15° and 30° for most outdoor positions. A steeper angle captures the tops of heads and shoulders rather than faces, which reduces the footage’s evidentiary value. For a driveway camera, a shallower tilt aimed at the approach path captures both the vehicle and the driver’s face as they exit.
Lens choice follows the location’s purpose. A narrow field of view with higher optical zoom suits a driveway or long approach where you need license plate legibility at 30–50 feet. A wide field of view suits a yard, foyer, or open retail floor where the goal is contextual coverage of a broad area. Mixing both types across a system gives you identification capability at key points and situational awareness everywhere else.
Pro Tip: Choose HDR or WDR-capable cameras for any doorway that faces east or west. Morning and afternoon sun directly behind a visitor will silhouette them completely on a standard sensor, rendering the footage useless for identification.
Common mistakes that create blind spots and useless footage
The most frequent installation error is mounting cameras too low — below 7 feet — where they can be redirected, spray-painted, or simply removed. The second most common is mounting them too high without upgrading the sensor resolution, which produces footage that shows an incident occurred but cannot identify who was responsible.
Sun and headlight glare account for a surprising share of unusable footage. A camera mounted on the west-facing wall of a garage will be blinded by headlights every evening. Positioning the camera under an eave or adding a sun shield resolves the problem without changing the camera itself. Under-eave mounting also reduces lens contamination from rain, bird droppings, and debris, cutting routine cleaning frequency substantially.
Network and bandwidth limitations are easy to overlook during planning. A 4K camera streaming continuously over a congested 2.4 GHz WiFi network will drop frames, buffer, or go offline entirely during the moments that matter most. Test the connection at the planned mount point before finalizing the location, and consider a wired PoE run for any camera where the WiFi signal is marginal.
Trying to cover both wide-area context and close-range identification with a single camera is a consistent compromise that satisfies neither goal. Two focused cameras — one wide, one narrow — at a high-priority entry point outperform a single camera attempting to split the difference.
Pro Tip: Before committing to a final mount, run a temporary power and video test at the planned position for 24–48 hours. Check the IR performance at night, verify motion-trigger zones, and confirm the angle holds up across different lighting conditions before drilling permanent anchors.
Mounting, power, weatherproofing, and installation best practices
Hardware choice by substrate determines long-term reliability. Use 3/8-inch lag bolts driven into wood studs for wood-frame structures, Tapcon anchors for masonry and brick, and through-bolts wherever the wall assembly allows. Toggle bolts rated for at least 50 pounds are acceptable for drywall-only mounting in low-vibration interior locations, but avoid relying on siding-only anchors for any exterior camera — siding flexes and expands seasonally, loosening fasteners over time.
Under-eave mounting is the preferred position for exterior cameras on most residential and commercial structures. The eave shields the lens from direct rain, reduces UV degradation of the housing, and keeps droppings and debris off the glass. Cameras mounted under eaves also tend to stay cleaner longer, which matters for IR performance at night.
Conduit and cable routing follow a simple rule: slope conduit downward and away from the camera head so water drains out rather than pooling at the connection point. Seal every wall penetration with silicone, and use UV-rated cable or protective conduit for any outdoor run exposed to direct sunlight. Surface-run cable degrades significantly faster than conduit-protected runs in outdoor UV conditions.
Power options each carry trade-offs worth understanding before committing to a layout. Wired AC or PoE provides the most reliable, continuous operation and is the right choice for primary entry-point cameras. Battery-plus-solar cameras offer flexibility where running conduit is impractical — a side-yard gate, a detached garage, a fence post — but require periodic maintenance and may not perform consistently through a New York winter with limited sun exposure. For a step-by-step overview of what the installation process involves, reviewing the process before booking a technician helps set accurate expectations.
Pro Tip: Test every gasket and seal annually, not just at installation. NYC weather cycles — freeze-thaw, summer humidity, driving rain — work silicone loose over time. A five-minute inspection each fall prevents water ingress that can destroy a camera housing from the inside.
When should you hire a licensed installer?
Some installations are straightforward enough for a confident property owner with basic tools. Others require a licensed low-voltage contractor, and the distinction matters both for safety and for legal compliance in New York City.
Situations that call for a professional include complex conduit runs through finished walls or ceilings, commercial-grade PoE network infrastructure, rooftop or high-elevation mounts, and any installation on an LPC-designated landmark façade. The NYC Landmarks Preservation Commission limits camera density on designated façades to no more than two cameras per 25 feet of street frontage for small buildings and three per 25 feet for large buildings. Permit applications for those properties require photographs, comparative drawings, and manufacturer cut sheets demonstrating minimal visual impact — documentation that a licensed installer is equipped to prepare.
What a licensed installer provides beyond physical mounting includes load-calculated wiring, properly rated anchors and through-bolts, professional sealing of all penetrations, and insured workmanship backed by documentation. For commercial properties, that documentation supports permit applications and satisfies insurance requirements. ASIS International’s security standards frame professional installation as a core component of a layered security program, not an optional upgrade.
New York’s video surveillance statutes add another layer of consideration. Cameras must not be placed in areas where individuals have a reasonable expectation of privacy. Audio recording raises separate eavesdropping liability, and many cameras ship with microphones enabled by default. Posting conspicuous notice of surveillance can create an exemption in certain employer and tenant contexts, but the specifics depend on the setting. A licensed installer familiar with New York surveillance law can flag these issues before they become compliance problems.
For small businesses integrating cameras with access control systems or door hardware, a single contractor coordinating both the low-voltage camera network and the door hardware reduces installation errors and simplifies future maintenance. NYC apartment buildings and multi-unit properties have additional building-level requirements covered in detail in YDA’s NYC apartment camera requirements guide.
Pro Tip: When applying for an LPC permit, attach manufacturer cut sheets to the application from the start. Applications submitted without them are routinely returned for supplemental documentation, adding weeks to the approval timeline.
Professional security camera installation from YDA Security Systems NYC
YDA Security Systems NYC installs residential and commercial camera systems across Manhattan, Brooklyn, Queens, and Staten Island, handling everything from single-family home upgrades to multi-location commercial deployments. Every project is completed by licensed and insured technicians, with a one-year warranty on all installation work and full documentation for permit and LPC applications where required.
For property owners who want to get placement right the first time, YDA offers on-site surveys that validate camera positions, test PoE run lengths, confirm WiFi signal at each mount point, and identify any LPC or code considerations before a single hole is drilled. The result is a system designed around your actual property rather than a generic template.
To schedule your security camera placement consultation or request an installation estimate, contact YDA Security Systems NYC directly. Bring the placement checklist from this guide to the survey and the technician will refine it to your specific building layout, entry points, and coverage goals.
Pro Tip: Book a pre-install WiFi and site survey so PoE run lengths and camera positions are confirmed before any conduit is cut. It takes less than an hour and eliminates the most common cause of post-install camera repositioning.
Sources
- Home Security Camera Placement Guide 2026: Where to Install for Coverage – The Home Picker
- Health, Safety, and LPC Permit Guidebook — Chapter 11 (Installing Security Cameras)
- Security
- Burglar Survey Study – SIAC, Inc.
FAQ
Where should outdoor security cameras be placed?
Mount cameras at the front door, back door, driveway and garage, first-floor windows, and side yard gates — the entry points most commonly used in property crimes. An 8–10 foot mounting height balances tamper resistance with usable facial identification on standard 1080p systems.
Where should you not put security cameras?
Never place cameras in bedrooms, bathrooms, locker rooms, or any space where individuals have a reasonable expectation of privacy. New York law prohibits surveillance in those areas, and audio recording in any location carries separate eavesdropping liability if microphones are left enabled by default.
What is the best place for a security camera inside a house?
The entry foyer and main stairwell provide the most useful indoor coverage, capturing anyone who has breached an exterior door. Mount indoor cameras at 7–9 feet and angle them to cover the full width of the space rather than a single narrow path.
How many security cameras does a typical home need?
Larger properties, townhouses with alley access, or small businesses typically require 6–8 cameras to close the additional coverage gaps.