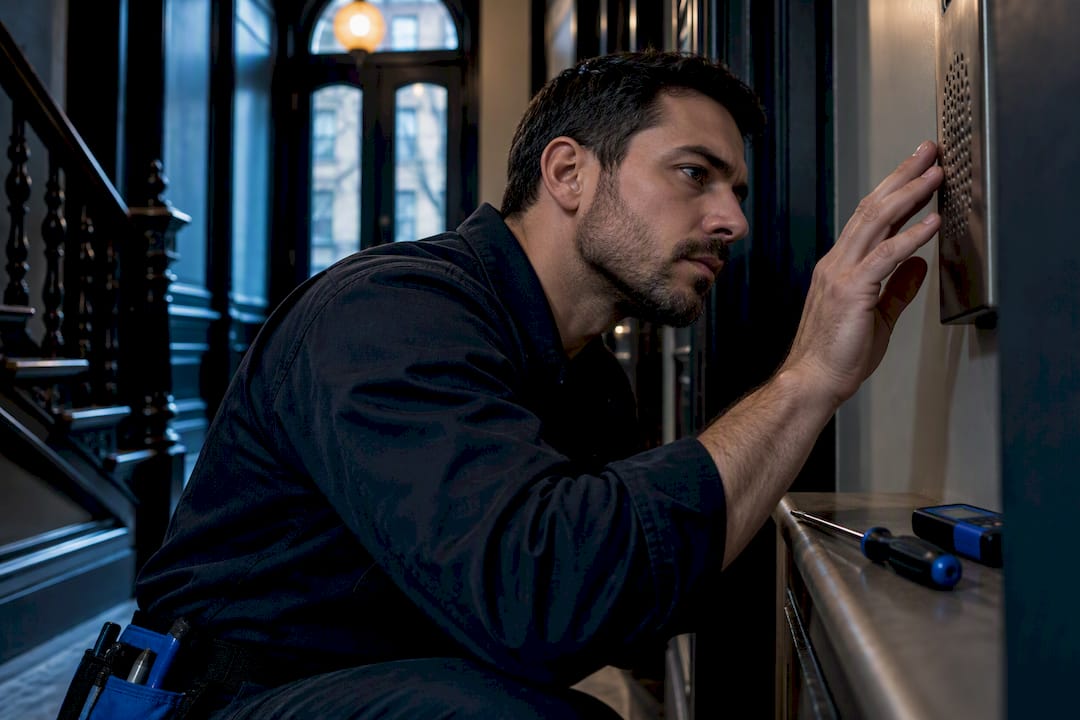
Welcome to your complete beginner-friendly guide on how to install a home security camera system, where you’ll learn exactly how to plan, set up, and optimize your cameras for maximum protection without needing professional help. Whether you want to monitor your front door, secure your property, or simply gain peace of mind, this guide walks you through every step from choosing the right equipment to proper placement, installation, and setup so you can confidently protect your home with a reliable and effective security system.
To install a home security camera system, choose suitable cameras, plan strategic placement, mount each unit securely, connect power or Wi-Fi, and configure settings through the app or recorder. Test camera angles, enable motion alerts, and ensure proper coverage for reliable home monitoring and security.
Before You Start: Choose The Right Type Of Security Camera System
Before you begin installing anything, it’s important to choose a security camera system that actually fits your home, lifestyle, and level of technical comfort. Many installation issues come from picking the wrong type of system rather than poor setup. Taking a few minutes to understand your options will help you avoid unnecessary frustration, reduce costs, and ensure your system works reliably over time.
Wired Vs. Wireless Security Camera Systems
Choosing between a wired and wireless system is one of the first and most important decisions you’ll make. Each option has clear advantages depending on your setup and expectations.
- Wired systems: These cameras connect through physical cables, typically Ethernet or coaxial. They are known for stable connections and consistent video quality since they are not dependent on Wi-Fi. However, installation can be more time-consuming because it involves running cables through walls or ceilings.
- Wireless systems: These cameras connect through Wi-Fi and are much easier to install, making them ideal for beginners. They offer flexibility in placement, but performance depends on your network strength and can be affected by interference or weak signals.
When deciding which option works best, consider your home layout and long-term needs. Wired systems are a better fit for larger homes or properties where reliability is critical, while wireless systems are ideal for smaller homes, apartments, or quick DIY setups.
Indoor, Outdoor, And Doorbell Cameras
Different areas of your home require different types of cameras, and choosing the right one ensures better coverage and durability.
- Indoor cameras: Best used for monitoring living areas, hallways, or entry points inside the home. These cameras are typically smaller and designed for discreet placement.
- Outdoor cameras: Built to withstand weather conditions such as rain, heat, and dust. They are essential for monitoring entrances, driveways, and perimeter areas.
- Doorbell cameras: Designed specifically for front-door monitoring, combining video recording with two-way audio so you can see and communicate with visitors remotely.
Outdoor cameras must have proper weather-resistance ratings to ensure they function reliably over time. Look for models with durable housing and protection against moisture and temperature changes to avoid early wear or failure.
NVR, DVR, Cloud, Or Local Storage
Understanding how your camera system records and stores footage is just as important as the cameras themselves. This affects how you access recordings, how much you pay over time, and how secure your data is.
- NVR systems: Network Video Recorder systems work with IP cameras and store footage digitally over a network. They offer high-quality video and are commonly used in modern wired setups.
- DVR systems: Digital Video Recorder systems are typically used with older analog cameras and store footage through coaxial connections. They are reliable but less flexible than newer options.
- Cloud storage: Stores video online, allowing you to access footage from anywhere. It is convenient but often requires a monthly subscription.
- Local storage: Saves footage directly on a memory card or hard drive within the system. This avoids subscription fees but may limit remote access depending on the setup.
For beginners, the key is balancing convenience and cost. Cloud storage is easier to manage, while local storage offers more control without ongoing fees. Choosing the right option depends on how often you plan to review footage and whether remote access is important to you.
Tools And Materials You May Need
Having the right tools ready before installation makes the process smoother and helps you avoid interruptions once you start mounting your cameras.
- Drill: Needed for creating mounting holes in walls, ceilings, or exterior surfaces.
- Screws and anchors: Used to securely attach camera brackets, especially on drywall or concrete surfaces.
- Ladder: Essential for installing cameras at proper heights, particularly for outdoor placements.
- Power extension options: Helpful when your camera location is far from a power outlet, ensuring continuous operation.
- Ethernet cable or power cable: Required for wired systems to connect cameras to the recorder or power source.
- Smartphone app or system software: Used to configure your cameras, view live footage, and manage settings during and after installation.
Preparing these tools ahead of time helps reduce installation errors and ensures you can complete the setup efficiently without delays.
Taking the time to choose the right system and prepare properly will make the entire installation process smoother and more effective, setting a solid foundation for a reliable home security setup.
Plan Your Camera Layout Before You Install Anything
Before you start drilling holes or mounting any hardware, it’s essential to plan your camera layout carefully. A well-thought-out setup ensures better coverage, fewer blind spots, and a more reliable system overall. Taking time to map out your camera positions based on your home’s layout, security priorities, and technical limitations will save you from costly adjustments later and help you get the most out of your investment.
Identify Your Main Security Goals
Your camera placement should always reflect what you actually want to protect. Instead of installing cameras randomly, define your priorities so each camera serves a clear purpose.
- Front door monitoring: Focus on capturing clear footage of anyone approaching or standing at your main entrance, including facial-level detail when possible.
- Package theft prevention: Position cameras to cover areas where deliveries are typically left, ensuring a direct line of sight to your porch or drop-off zone.
- Driveway coverage: Use cameras to monitor vehicles, license plates, and activity around your driveway, especially if it connects directly to your home.
- Backyard and side entrance visibility: These areas are often less visible from the street, making them common entry points that require dedicated coverage.
- Indoor monitoring for entry points or valuables: Place cameras inside near main entryways or rooms with high-value items to track movement if someone gains access.
Best Places To Install Home Security Cameras
Strategic placement is what separates a basic setup from an effective security system. The goal is to cover all key access points while maintaining clear visibility.
- Front door: This is the most critical location, as it handles the majority of foot traffic and potential interactions.
- Back door: Often overlooked, this entry point is a common target due to reduced visibility from neighbors or the street.
- Ground-floor windows: These are vulnerable access points, especially if they are hidden from plain view or located in darker areas.
- Garage: Monitor both the interior and exterior if possible, as garages often store valuable tools and provide access to the home.
- Driveway: A well-placed camera here helps track vehicle movement and adds an extra layer of security.
- Main hallway or entry points inside the home: Indoor cameras should focus on areas where someone would naturally pass through after entering.
Avoid Common Camera Placement Mistakes
Even high-quality cameras can underperform if they are installed incorrectly. Avoiding common mistakes ensures you get clear, usable footage when it matters most.
- Blocking the view with walls, plants, or light glare: Always check for physical obstructions or reflective surfaces that could distort or block the camera’s field of view.
- Mounting too low or too high: Cameras placed too low are easier to tamper with, while cameras placed too high may miss important details like faces.
- Pointing cameras directly into sunlight: Direct sunlight can wash out footage and reduce visibility, especially during sunrise and sunset.
- Creating blind spots: Overlapping camera coverage is important to ensure there are no gaps where activity can go unnoticed.
- Installing through windows when night glare will be a problem: Indoor cameras pointed through glass can suffer from reflection and infrared glare, making night footage ineffective.
Check Wi-Fi Strength, Power Access, And Viewing Angles
Technical setup is just as important as physical placement, especially for wireless or smart-camera systems. Testing these elements before installation prevents connectivity issues and poor performance.
- Importance of signal range for wireless systems: Ensure each camera is within a strong Wi-Fi signal area to avoid lag, disconnections, or poor video quality.
- Nearby power source planning: For wired or plug-in cameras, confirm that power outlets are accessible without requiring unsafe or messy cable runs.
- Testing angles before permanent mounting: Temporarily position your cameras and check the live feed to confirm coverage, clarity, and framing before securing them in place.
A carefully planned layout makes installation smoother and ensures your system performs exactly as intended, giving you reliable coverage and greater confidence in your home’s security.
Understand Privacy, Neighbor Visibility, and Local Rules
Installing a home security camera system is not just about coverage and protection. It also involves being responsible with how and where your cameras capture footage. Taking the time to understand privacy considerations, neighbor visibility, and any applicable local rules helps you avoid potential conflicts while building a system that is both effective and respectful.
Be Mindful Of Where Your Cameras Point
One of the most common mistakes homeowners make is placing cameras in a way that unintentionally captures areas beyond their property. While your goal is to improve security, it is important to ensure that your system does not invade someone else’s privacy.
- Focus on key zones: Position cameras to monitor entry points such as doors, driveways, and walkways rather than wide, unnecessary areas
- Limit external visibility: Adjust angles so your cameras do not directly face neighboring windows, backyards, or private spaces
- Use privacy masking features: Many modern systems allow you to block out specific areas in the camera’s field of view to prevent recording sensitive zones
- Test your camera view: Always check the live feed after installation to confirm that only relevant areas are captured
Keeping your coverage targeted not only improves the quality of your footage but also reduces the risk of disputes or complaints.
Review Local Laws Or HOA Rules If Relevant
Before finalizing your installation, it is worth taking a few minutes to review any local guidelines or community rules that may apply. While requirements vary by location, being informed helps you avoid legal issues and ensures your system is compliant.
- Check local regulations: Some areas have specific rules about recording audio or placing cameras in certain locations
- Review HOA guidelines: If you live in a managed community, there may be restrictions on camera placement, visibility, or exterior modifications
- Understand signage requirements: In some regions, you may be required to inform visitors that surveillance is in use
- Stay updated: Laws and policies can change, so it is good practice to review them periodically
Approaching installation with a privacy-aware mindset builds trust with neighbors and ensures your home security setup is both effective and responsible.
Being thoughtful about camera placement and aware of local expectations helps you create a security system that protects your home without overstepping boundaries, giving you peace of mind while maintaining respect for those around you.
How To Install A Home Security Camera System Step By Step
Installing a home security camera system is much easier when you follow a structured, step-by-step process. Taking the time to plan, test, and properly set up each component ensures your system works reliably from day one. This section walks you through each stage with practical guidance to help you avoid common mistakes and get the best possible coverage.
Step 1: Unbox The System And Read The Manufacturer Instructions
Start by carefully unboxing your system and reviewing the manufacturer-provided guide. Even if you have experience with similar devices, each system has unique setup requirements that can affect performance.
- Component check: Confirm that all cameras, mounts, cables, screws, power adapters, and accessories are included before you begin
- Battery preparation: Charge battery-powered units fully so you do not interrupt installation later
- App setup: Download the official app in advance to streamline the setup process and avoid delays during installation
Taking a few extra minutes here helps prevent interruptions once you begin mounting and connecting your cameras.
Step 2: Set Up The Base Station, Recorder, Or App
Before installing cameras physically, you need to establish the system’s core connection. This could be a base station, NVR, DVR, or a mobile app, depending on your setup.
- System connection: Connect the hub, NVR, or DVR to your router and power source if your system uses one
- Account creation: Set up your account and begin pairing devices so everything is recognized by the system
- Firmware update: Install the latest updates to improve performance, security, and compatibility
Completing this step first ensures your system is ready to detect and manage cameras as soon as they are installed.
Step 3: Test Camera Positioning Before Mounting
One of the most important yet often skipped steps is testing placement before drilling any holes. Temporary positioning allows you to optimize coverage and avoid poor angles.
- Trial placement: Use tape or temporary mounts to position cameras in intended locations
- Field of view check: Review live footage during both daytime and nighttime to ensure clear visibility
- Motion range test: Walk through monitored areas to confirm motion detection triggers accurately
This step helps you fine-tune placement so you do not have to reinstall cameras later.
Step 4: Mount The Cameras Securely
Once you are satisfied with positioning, you can proceed with permanent installation. Proper mounting ensures stability and long-term durability.
- Drill preparation: Mark exact hole positions before drilling to avoid misalignment
- Secure mounting: Use anchors when installing on drywall, brick, or concrete for added support
- Weather readiness: Ensure outdoor cameras are installed in weather-appropriate locations with protection from direct exposure
- Adjustability: Leave slight flexibility to fine-tune camera angles after mounting
A secure installation prevents shifting, vibration, and tampering over time.
Step 5: Connect Power Or Cables
Reliable power and clean cable management are essential for consistent performance. This step varies depending on whether your system is wired or wireless.
- Safe power connection: Plug in cameras using appropriate outlets and avoid overloading circuits
- Cable routing: Run cables along walls, ceilings, or soffits to keep them organized and discreet
- Outdoor protection: Use conduit or protective covers to shield exposed cables from weather damage
- PoE setup: For Power-over-Ethernet systems, connect Ethernet cables securely to both the camera and the recorder
Neat and secure connections reduce the risk of disconnections and system failures.
Step 6: Connect Cameras To Wi-Fi Or Recorder
With cameras mounted and powered, the next step is connecting them to your system for monitoring and recording.
- Device pairing: Add cameras individually through the app or recorder to ensure proper recognition
- Connection check: Confirm that each camera provides a stable live feed without lag or dropouts
- Camera labeling: Assign names based on location such as front door or backyard for easier management
Proper setup here makes it much easier to monitor and control your system later.
Step 7: Adjust Camera Angles And Detection Zones
Fine-tuning your camera settings is what turns a basic setup into an effective security system. Small adjustments can significantly improve performance.
- Coverage focus: Aim cameras toward entry points, walkways, and high-risk areas
- False alert reduction: Adjust positioning to avoid busy streets, moving trees, or frequent motion triggers
- Zone customization: Set motion detection zones within the app to monitor only relevant areas
- Notification control: Configure alerts to balance awareness without overwhelming notifications
These adjustments help ensure you capture meaningful activity while minimizing unnecessary alerts.
Step 8: Test Daytime, Night Vision, And Motion Alerts
The final step is to thoroughly test your system under real-world conditions. This confirms everything is working as expected before you rely on it for security.
- Walk testing: Move through each monitored area to verify motion detection accuracy
- Night visibility: Check footage in low-light conditions to ensure night vision is clear and usable
- Alert verification: Confirm that notifications are delivered correctly to your phone or device
Testing gives you confidence that your system will perform reliably when it matters most.
With the right setup and careful attention to detail, installing a home security camera system becomes a straightforward process that delivers long-term protection and peace of mind.
How To Install Different Types Of Security Cameras
Installing a home security camera system is not a one-size-fits-all process. The installation approach depends on the type of camera you choose, your home layout, and how much control or flexibility you want. Understanding the differences between wireless, wired, indoor, and outdoor setups will help you install your system correctly the first time and avoid common performance issues.
How To Install Wireless Security Cameras
Wireless security cameras are the fastest and most beginner-friendly option, making them ideal for DIY installation. These systems rely on Wi-Fi connectivity and are often controlled through a mobile app, which simplifies both setup and ongoing use.
To install wireless cameras effectively, focus on these key factors:
- Wi-Fi signal strength: Ensure the camera location has a strong and stable connection to avoid lag, disconnections, or poor video quality
- Battery management: Choose placement that allows easy access for recharging or battery replacement, especially for outdoor units
- App-based setup: Follow the manufacturer’s app instructions carefully, including scanning QR codes, connecting to your network, and updating firmware
Start by placing the camera temporarily and testing the live feed through the app before mounting it permanently. This helps you confirm both signal reliability and viewing angles without committing to a fixed position too early.
How To Install Wired Security Cameras
Wired security cameras are known for their long-term stability and consistent performance. Unlike wireless systems, they are not dependent on Wi-Fi signals, which makes them a strong choice for larger homes or areas with unreliable internet coverage.
However, installation requires more planning and effort:
- Cable routing: Plan the path for Ethernet or coaxial cables in advance to keep them hidden, protected, and organized
- Power supply setup: Ensure each camera has access to a continuous power source or is connected to a central recording system like an NVR or DVR
- Central hub connection: Connect all cameras to the recorder and verify that each feed is recognized and functioning correctly
Take time to map out your system before drilling or running cables. A clean, well-planned installation not only looks better but also reduces the risk of damage, interference, or future maintenance issues.
How To Install Outdoor Security Cameras
Outdoor security cameras play a critical role in protecting your home’s perimeter, so proper installation is essential for both performance and durability. These cameras must withstand environmental conditions while maintaining clear visibility.
Focus on these best practices during installation:
- Weather-resistant placement: Always use cameras rated for outdoor use and install them in locations that minimize direct exposure to heavy rain or extreme heat
- Mounting height: Position cameras approximately 8 to 10 feet above ground to balance visibility and protection from tampering
- Sun and glare control: Avoid pointing cameras directly toward sunlight, which can wash out footage and reduce image clarity
Whenever possible, install cameras under eaves or other sheltered areas. This adds an extra layer of protection against harsh weather and helps extend the lifespan of your equipment.
How To Install Indoor Security Cameras
Indoor security cameras are generally easier to install and maintain, but placement still plays a major role in how effective they are. The goal is to monitor key areas without creating blind spots or unnecessary coverage.
Consider these placement strategies:
- High-traffic areas: Install cameras near entryways, hallways, and living spaces where movement is most likely to occur
- Sensitive locations: Use cameras in areas like nurseries or home offices where monitoring may be especially important
- Cable organization: Keep wires neatly managed along walls or use cable covers to maintain a clean, clutter-free setup
Indoor cameras are less exposed to environmental risks, but they still benefit from thoughtful positioning. Avoid placing them too low or behind objects that could block the field of view.
Installing the right type of camera the right way makes a noticeable difference in both security and reliability. By understanding how each system works and taking the time to plan your setup, you can build a camera system that performs consistently and gives you real peace of mind.
Best Practices for a Safer, More Effective Camera Setup
Installing your home security camera system is only the first step. To get the most value from your setup, you need to focus on security, reliability, and long-term performance. Small adjustments in how you manage your system can make a significant difference in both protection and usability, especially when it comes to safeguarding your data and ensuring your cameras work when you need them most.
Use Strong Passwords and Two-Factor Authentication
One of the most overlooked aspects of a home security camera system is account security. Since most modern cameras are connected to apps and cloud services, weak login credentials can expose your entire system to unauthorized access.
- Use a unique password: Create a strong, hard-to-guess password that combines letters, numbers, and symbols, and avoid reusing passwords from other accounts
- Enable two-factor authentication: Add an extra layer of protection by requiring a verification code sent to your phone or email when logging in
- Avoid default credentials: Change the default username and password immediately after setup, as these are often publicly known
- Limit shared access: Only give account access to trusted users and avoid logging in on public or shared devices
Taking these steps ensures your system is not just physically secure but also digitally protected against potential breaches.
Keep Firmware and Apps Updated
Keeping your camera system up to date is essential for maintaining performance and protecting against vulnerabilities. Manufacturers regularly release updates to fix bugs, improve features, and strengthen security.
- Install firmware updates promptly: Updates often include security patches that protect against newly discovered threats
- Update mobile apps regularly: Ensure you are using the latest version of the camera app for better functionality and compatibility
- Enable automatic updates if available: This helps keep your system protected without requiring manual checks
- Check update logs: Reviewing what each update includes can help you understand improvements and new features
Regular updates not only improve system reliability but also ensure your cameras remain compatible with newer devices and networks.
Improve Lighting for Better Night Footage
Even the best cameras can struggle in poor lighting conditions. While many systems include night-vision capabilities, improving ambient lighting can significantly enhance video clarity and detail.
- Install motion-activated lights: These lights illuminate the area when movement is detected, improving visibility and deterring intruders
- Use consistent porch lighting: A well-lit entry point helps cameras capture clearer facial details and activity
- Adjust camera angles: Position cameras to avoid direct glare from lights while still capturing illuminated areas
- Reduce shadows and blind spots: Strategic lighting placement helps eliminate dark zones where activity could go unnoticed
Better lighting not only improves footage quality but also increases the effectiveness of your overall security setup.
Back Up Important Footage
Recording footage is only useful if you can access it when needed. Choosing the right storage method and backup strategy ensures your recordings are محفوظ and retrievable.
- Use cloud storage for remote access: Cloud-based systems allow you to view and retrieve footage from anywhere, even if the camera is damaged or stolen
- Maintain local backups: Network video recorders or SD cards provide an additional layer of storage without relying on internet access
- Set recording preferences carefully: Decide between continuous recording or motion-triggered recording based on your needs and storage capacity
- Review retention settings: Ensure important footage is not automatically deleted before you have a chance to review or save it
Storage settings play a critical role after installation because they determine how long footage is kept and how easily it can be accessed. Without proper configuration, you may miss important events or lose valuable recordings.
A well-installed system becomes truly effective when it is properly maintained and secured, and by following these best practices, you can ensure your home security cameras remain reliable, clear, and ready to protect what matters most.
Common Home Security Camera Installation Mistakes to Avoid
Even a well-planned home security camera system can fall short if a few critical details are overlooked during installation. Many of the most common issues are not caused by faulty equipment but by avoidable setup mistakes that reduce coverage, clarity, and overall effectiveness. Understanding these pitfalls ahead of time helps you build a system that actually delivers reliable protection instead of just a false sense of security.
Relying On One Camera To Cover Too Much Space
Trying to stretch the coverage of a single camera across a wide area often leads to poor results. While it may seem cost-effective, it usually sacrifices detail and accuracy.
- Limited Detail Capture: Wide coverage reduces image clarity, making it harder to identify faces, license plates, or small movements.
- Missed Angles: One camera cannot capture multiple directions effectively, leaving blind spots around entry points.
- Reduced Detection Accuracy: Motion detection becomes less reliable when too much area is monitored at once.
A better approach is to use multiple cameras with focused coverage, ensuring each critical area is clearly visible and properly monitored.
Ignoring Internet Dead Zones
Wireless cameras depend heavily on a stable internet connection, and poor signal strength can disrupt performance in ways that are easy to overlook during setup.
- Connection Drops: Weak Wi-Fi signals can cause cameras to go offline intermittently, leaving gaps in monitoring.
- Delayed Alerts: Slow connectivity may result in delayed motion notifications or missed events.
- Low Video Quality: Cameras may downgrade resolution to maintain connection, reducing footage clarity.
Before finalizing placement, test Wi-Fi strength in each location and consider using a Wi-Fi extender or mesh network for consistent coverage.
Mounting Cameras Where Glare Ruins Footage
Improper placement relative to light sources can significantly reduce the quality of recorded footage, especially during certain times of day.
- Sunlight Interference: Direct sunlight can wash out images or create harsh shadows that obscure details.
- Night Reflection Issues: Lights reflecting off walls, windows, or surfaces can distort night vision performance.
- Lens Flare Distortion: Bright light sources can cause glare that reduces visibility and contrast.
Position cameras at angles that avoid direct exposure to strong light sources and test visibility during both daytime and nighttime conditions.
Skipping Final Motion-Alert Testing
Many installations stop once the cameras are mounted and connected, but failing to test motion detection can leave your system unreliable.
- Incorrect Sensitivity Levels: Motion alerts may trigger too often or not at all if sensitivity is not properly adjusted.
- Unoptimized Detection Zones: Cameras may monitor irrelevant areas like streets or trees instead of key entry points.
- Missed Critical Events: Without testing, important movements may go undetected.
Walk through monitored areas, trigger alerts intentionally, and fine-tune settings to ensure accurate and useful notifications.
Leaving Default Passwords Or Settings Unchanged
Security systems are only as strong as their weakest access point, and default settings are one of the most common vulnerabilities.
- Unauthorized Access Risk: Default credentials are widely known and can be exploited by attackers.
- Data Privacy Concerns: Unsecured systems can expose live feeds or recorded footage.
- System Control Issues: Unauthorized users may alter settings or disable cameras.
Always create strong, unique passwords and enable additional security features such as two-factor authentication if available.
Forgetting Storage Capacity And Retention Settings
Recording footage is only useful if it is stored correctly and retained long enough to be reviewed when needed.
- Storage Overwrites: Limited storage can cause important footage to be overwritten too quickly.
- Inadequate Retention Periods: Short retention windows may not meet your security needs.
- Unexpected Costs: Cloud storage plans may require subscriptions that are not considered upfront.
Review your storage setup, choose appropriate retention settings, and ensure your system balances capacity, cost, and accessibility.
Taking the time to avoid these common mistakes can significantly improve the performance and reliability of your home security system, helping you get the protection and peace of mind you expect from your investment.
Troubleshooting After Installation
Even with careful planning and setup, it’s normal to run into a few issues after installing your home security camera system. Most problems are not caused by faulty equipment but by small configuration gaps, environmental factors, or connectivity limitations. The good news is that these issues are usually easy to fix once you understand what to look for and how to adjust your setup properly.
Camera Won’t Connect to Wi-Fi
If your camera is not connecting to Wi-Fi, the issue is often related to signal strength or setup compatibility rather than the device itself. Wireless cameras depend heavily on a stable network, and even minor disruptions can prevent proper pairing.
- Signal strength: Make sure the camera is within a strong Wi-Fi coverage area. If the signal is weak, consider moving the router closer or using a Wi-Fi extender.
- Band compatibility: Many cameras only support 2.4 GHz networks, not 5 GHz. Check your router settings and connect to the correct band during setup.
- App pairing steps: Follow the manufacturer’s instructions carefully, including resetting the camera if needed and ensuring your phone is connected to the same network.
A quick way to diagnose this is to temporarily move the camera closer to the router. If it connects easily, the issue is almost always signal-related.
Motion Alerts Are Too Sensitive or Not Sensitive Enough
Motion detection settings can feel frustrating at first, especially if you’re getting constant alerts or missing important activity. Fine-tuning these settings is essential for a reliable system.
- Activity zones: Define specific areas where motion should be detected, such as entry points, instead of covering the entire frame.
- Detection distance: Adjust how far the camera detects movement so it focuses on meaningful activity rather than distant motion.
- Notification settings: Customize alert frequency and sensitivity to avoid unnecessary notifications while still capturing important events.
Most modern cameras allow you to preview detection zones in real time, which makes it easier to calibrate accurately.
Night Vision Looks Poor
Poor night vision is usually caused by environmental factors rather than camera quality. Infrared night vision can be affected by reflections, nearby surfaces, and lighting conditions.
- Reflections: Avoid mounting cameras too close to walls, ceilings, or glass surfaces, as infrared light can bounce back and wash out the image.
- Lighting conditions: Remove or reposition nearby light sources that may interfere with night mode, such as porch lights shining directly into the lens.
- Lens placement: Ensure the camera is angled properly and not obstructed by objects like branches, dirt, or protective covers.
Testing your camera at night and making small adjustments can significantly improve clarity and visibility.
Live Feed Keeps Dropping
If your live feed cuts in and out, the issue is almost always tied to network stability or device performance. A consistent connection is critical for real-time monitoring.
- Router distance: Keep cameras within a reasonable range of your router, especially for outdoor installations where walls and obstacles can weaken the signal.
- Interference: Reduce interference from other devices such as microwaves, cordless phones, or crowded Wi-Fi networks.
- Firmware updates: Regularly update both your camera and router firmware to ensure compatibility and improved performance.
If the problem persists, consider upgrading your router or adding a mesh Wi-Fi system to provide more consistent coverage across your home.
Even a well-installed system needs small adjustments to perform at its best, so take the time to test, tweak, and optimize your setup until everything runs smoothly.
Should You Install a Home Security Camera System Yourself or Hire a Pro?
Choosing between a do-it-yourself installation and hiring a professional depends on your home layout, the type of system you plan to use, and how comfortable you are with basic tools and setup processes. Both options can deliver strong results when done correctly, but the right choice comes down to balancing convenience, cost, and the level of complexity involved in your setup.
When DIY Installation Makes Sense
For many homeowners, installing a home security camera system yourself is not only possible but surprisingly straightforward. Modern systems are designed with user-friendly features that make setup accessible even if you have limited technical experience.
- Wireless systems: Wireless cameras are the easiest option for DIY installation because they eliminate the need for extensive wiring. Most connect through a mobile app, allowing you to pair devices, adjust settings, and monitor footage directly from your phone. This makes them ideal for quick, low-effort setups.
- Small homes or apartments: In smaller living spaces, coverage is easier to achieve with fewer cameras and simpler placement. You can typically secure key entry points without needing advanced planning or specialized tools, making a self-install approach both practical and cost-effective.
- Simple front-door and backyard coverage: If your goal is to monitor basic areas like your front door or backyard, a DIY setup is usually sufficient. Mounting one or two cameras in strategic locations and connecting them to your app can provide reliable visibility without the need for professional assistance.
DIY installation works best when the system is straightforward and the layout of your home does not require complicated routing or multiple camera zones. With proper planning and careful placement, you can achieve strong security coverage on your own.
When Professional Installation May Be Worth It
While DIY works well in many situations, there are cases where hiring a professional can save time, reduce frustration, and ensure a more polished result. Complex systems often require technical expertise that goes beyond basic setup.
- Large properties: Bigger homes or properties with multiple entry points often require more cameras and careful positioning to avoid blind spots. A professional can assess your layout and design a system that provides full, well-balanced coverage across all areas.
- Complex wired systems: Wired camera systems offer stable connections and continuous recording, but they involve running cables through walls, ceilings, or outdoor spaces. Professional installers have the tools and experience to handle these installations cleanly and safely, avoiding damage to your property.
- Multi-camera setups with NVR or DVR and cable runs: When you are installing multiple cameras connected to a central recording system, the setup becomes more technical. Professionals can ensure proper cable management, optimal camera angles, and seamless integration with your recording device, resulting in a more reliable and organized system.
In these scenarios, professional installation is less about convenience and more about achieving a high-quality, long-term solution that performs consistently. It can also help you avoid common mistakes that may reduce system effectiveness or require costly adjustments later.
Ultimately, the decision comes down to your specific needs. If your setup is simple and manageable, DIY installation can be a practical and rewarding option. If your system is more advanced or your property requires detailed planning, investing in professional installation can provide greater confidence and long-term reliability.
Take the next step with confidence by choosing a home security camera system that’s been tested for performance, reliability, and ease of use. Explore our expert-recommended systems to save time, avoid mistakes, and get your setup right the first time.
FAQs: About How to Install a Home Security Camera System
- What is the easiest way to install a home security camera system?
The easiest way is to use a wireless camera system with a mobile app for setup. These systems require minimal wiring and allow you to connect, mount, and configure cameras quickly. Most beginners can complete installation in a few hours. - Do I need professional help to install security cameras?
Not necessarily, as many modern systems are designed for DIY installation. If you are using a simple wireless setup, you can install it yourself. However, complex wired systems or large properties may benefit from professional installation. - Where should I place security cameras around my home?
Focus on entry points such as front and back doors, driveways, and garages. Position cameras at a height of about 8 to 10 feet for optimal visibility and protection from tampering. Avoid placing cameras where obstacles or glare may block the view. - Can I install security cameras without Wi-Fi?
Yes, wired systems using DVR or NVR setups can operate without Wi-Fi. However, you will need internet access if you want remote viewing or mobile alerts. Wireless cameras rely on Wi-Fi for full functionality. - How long does it take to install a home security camera system?
Installation time varies depending on the system type and number of cameras. A basic wireless setup can take 1 to 3 hours, while a wired system may take several hours or a full day. Planning camera placement in advance can speed up the process. - What tools are required to install security cameras?
Common tools include a drill, screwdriver, mounting screws, anchors, and a ladder for outdoor installations. Wired systems may also require cables and connectors. Always check the manufacturer’s installation requirements before starting. - How do I connect my security cameras to my phone?
Download the manufacturer’s app, create an account, and follow the in-app setup instructions. Most systems guide you through scanning a QR code or connecting via Wi-Fi. Once connected, you can view live footage and receive alerts on your phone. - Are home security cameras worth installing?
Yes, they help deter crime, monitor activity, and provide evidence if needed. Many homeowners also gain peace of mind from being able to check their property remotely. The benefits often outweigh the initial cost and setup effort. - How can I avoid false motion alerts?
Adjust motion sensitivity settings and define activity zones within the camera app. Position cameras away from busy streets, trees, or moving shadows. Fine-tuning these settings helps reduce unnecessary notifications. - How often should I maintain my security camera system?
Regular maintenance is recommended every few months. Clean camera lenses, check connections, update firmware, and test functionality. Routine checks ensure your system continues to operate effectively and reliably.
Conclusion
Installing a home security camera system is not just about buying the right equipment, it is about making smart decisions before, during, and after installation. A well-thought-out plan ensures your cameras actually cover the areas that matter most, while proper placement helps capture clear, usable footage instead of wasted angles. Testing your system after setup is equally important, since even a high-quality camera can fall short if the positioning or settings are off. Over time, simple maintenance such as cleaning lenses, checking connections, and updating software keeps everything running smoothly and reliably. When you combine thoughtful planning with consistent upkeep, your security system becomes a dependable, long-term investment that gives you real peace of mind rather than just the appearance of protection.