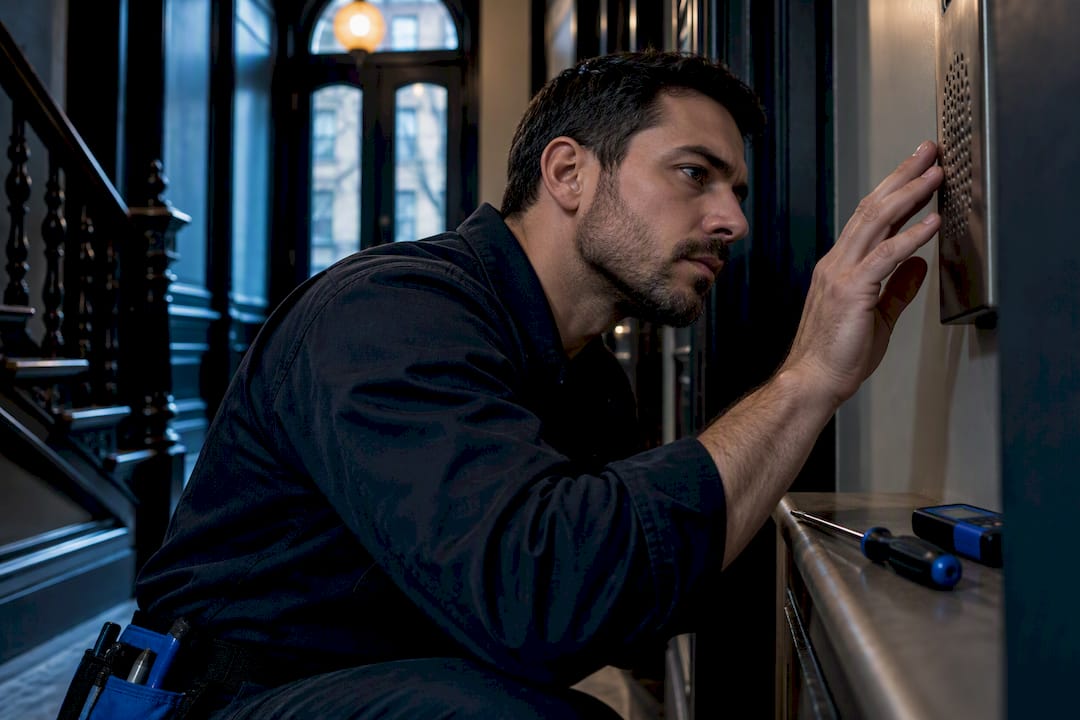
Welcome to our step-by-step guide on how to install an Aiphone intercom, where you’ll learn everything from the tools you need to wiring basics, mounting tips, and troubleshooting advice—all explained in simple, human-friendly language so you can set up your system with confidence and improve communication and security in your home or office.
To install an Aiphone intercom, first choose the right location for the master station, then mount it securely, run the necessary wiring, connect the power supply, and install any door or sub-stations before testing the system to ensure clear audio and video.
What Is An Aiphone Intercom?
An Aiphone intercom system is a modern communication tool that allows people in different areas of a building or property to talk to each other without the need for phones or shouting across rooms. Aiphone is a trusted global brand known for creating reliable intercom solutions used in both homes and businesses. Their systems are designed to improve convenience, safety, and overall communication.
Types Of Aiphone Intercoms
Aiphone offers several types of intercom systems to meet different needs:
- Audio-only intercoms – These are basic systems that allow two-way voice communication between stations. They are commonly used inside homes or offices for simple communication.
- Aiphone video intercoms – These models come with video capability, allowing you to see who is at the door or entry point before granting access. They add an important layer of security to both residential and commercial spaces.
- Aiphone door stations – These units are usually installed at entry points such as gates or main doors. They connect with master or sub-stations inside, making it easy to screen visitors before letting them in.
Common Uses Of Aiphone Intercom Systems
- Home security – Families use Aiphone intercoms to identify visitors before opening the door, monitor entryways, and even communicate across rooms.
- Office communication – Businesses benefit from quick internal communication without relying on phones. Intercoms also help manage secure access to restricted areas.
- Gated entry – For apartments, gated communities, or commercial properties, an Aiphone door station allows residents or employees to control who enters.
Key Benefits Of Aiphone Intercoms
- Convenience – You can communicate instantly between rooms or with someone at the front door.
- Safety – A video intercom helps you confirm a visitor’s identity before granting entry, reducing security risks.
- Peace of mind – Knowing your home or office has a reliable communication and entry system adds confidence and comfort.
In short, an Aiphone intercom system is more than just a communication device—it’s a practical tool that brings added safety, better control over access, and simple day-to-day convenience. Whether you choose an audio-only model, a video intercom, or a door station, Aiphone offers solutions designed to make your space more secure and connected.
Tools And Materials You’ll Need
Before you start installing an Aiphone intercom system, it’s important to gather all the right tools and materials. Being prepared from the beginning saves time, prevents mistakes, and makes the installation process much smoother. Below is a clear list of what you’ll need.
Essential Tools
- Drill: Required for making holes in walls or mounting brackets. Choose one with multiple drill bits to handle different surfaces like drywall, brick, or wood.
- Screwdriver: Both flathead and Phillips screwdrivers will help secure screws and adjust fittings.
- Level: A simple tool to ensure your master station and sub-stations are perfectly aligned.
- Wiring tools: Wire cutters, strippers, and crimpers are needed for clean connections and proper cable management.
Required Materials
- Aiphone intercom kit: This includes the master station, sub-stations, and in some models, a door station with a built-in camera.
- Mounting hardware: Screws, anchors, and brackets to securely attach each unit to the wall.
- Wiring: Low-voltage wiring suitable for your model. Always check the Aiphone installation manual for exact wire gauge recommendations.
- Power supply: A transformer or adapter provided in the kit, which connects your intercom system to power safely.
Pro Tip
Have everything ready before you begin. Lay out the tools and check that your kit includes all necessary parts. This prevents interruptions and reduces the risk of wiring mistakes during setup.
Safety Reminder
Always turn off the electricity in the area where you’ll be working before handling any wiring. This step is critical for your safety and helps protect the equipment from damage. If you’re not confident about handling electrical components, it’s best to call a licensed professional for assistance.
Gathering the right tools and materials is the foundation of a smooth installation. With these essentials at hand and safety steps in place, you’ll be well-prepared to move forward with your Aiphone intercom setup.
Pre-Installation Checklist
Before you start mounting or connecting your Aiphone intercom system, it’s important to run through a quick checklist. Taking the time to prepare ensures the installation goes smoothly, saves you from unexpected issues, and helps avoid costly mistakes later.
Check Your Home’s Wiring Compatibility
Not all intercom systems run on the same wiring. Aiphone models often use low-voltage wiring, but some older homes may not have the correct setup in place. Before starting, look at your existing wiring or check behind the walls where you plan to install the master station. If you’re not sure what type of wiring you have, review the installation guide included with your Aiphone intercom or consult a professional. Making sure the wiring matches the system requirements is the foundation of a successful installation.
Decide Where To Place Master Station And Sub-Stations
Placement is key for both convenience and functionality. The master station should usually be installed in a central location, such as a living room, hallway, or office reception area, where it’s easy to access. Sub-stations, on the other hand, should be placed in high-use areas like bedrooms, kitchens, or entry points. Think about the daily routines in your household or workspace—placing units where people naturally spend time ensures the system adds real value.
Measure Distances For Wiring Runs
Measuring the distance between the master station, sub-stations, and any door stations is crucial. Aiphone systems have specific maximum wiring lengths depending on the model, so exceeding those limits can lead to poor sound quality or weak video feeds. Use a measuring tape to calculate each run and double-check the numbers against the manufacturer’s instructions. Planning your wiring paths ahead of time reduces errors and keeps the installation clean.
Confirm Wi-Fi Strength If Using A Network-Based Aiphone Model
If you’re installing an Aiphone intercom that relies on Wi-Fi, take a moment to check the signal strength in the areas where you’ll be mounting the stations. Weak connections can cause delays, poor video quality, or dropped calls. You can use your smartphone to test the Wi-Fi signal where the unit will be installed. If the signal is weak, consider adding a Wi-Fi extender or adjusting your router placement before you begin.
Note: When To Call A Licensed Electrician
While many Aiphone intercom installations can be handled by homeowners, there are times when professional help is necessary. If your system requires new wiring, involves high-voltage connections, or if you’re simply uncomfortable handling electrical work, it’s best to call a licensed electrician. Safety should always come first, and a professional can make sure everything is installed correctly and up to code.
By going through this pre-installation checklist, you’ll save time, reduce frustration, and set yourself up for a hassle-free Aiphone intercom installation. Careful preparation makes all the difference in how well your system performs once it’s up and running.
Step-By-Step Guide: Installing An Aiphone Intercom
Installing an Aiphone intercom may sound technical, but with the right tools and preparation, it’s a project most homeowners can handle. Below is a clear, step-by-step breakdown to help you mount, wire, and test your intercom system with confidence.
Step 1: Choose The Right Location
The first step is to decide where your master station will go. A good rule of thumb is to place it at eye level, usually around 55 to 65 inches from the floor. This makes it comfortable for most people to use without bending or stretching.
Make sure the area is easy to access and visible. You’ll want a spot where you can quickly answer a call or see who’s at the door. Avoid placing the unit in tight corners or behind furniture where it’s hard to reach.
Step 2: Mount The Master Station
Once you’ve chosen the location, it’s time to mount the station. Start by holding the bracket against the wall and marking your drill points with a pencil. Double-check that the bracket is straight using a level, as a crooked installation can affect both function and appearance.
After drilling the holes, secure the bracket firmly with screws. Attach the master station to the bracket according to the manufacturer’s instructions. A solid, level mount ensures the intercom works properly and looks professional.
Step 3: Run The Wiring
Running the wiring is often the most time-consuming part of installation. Plan the path of your cables before you start. Run them through walls or ceilings carefully to avoid damaging existing electrical systems.
Label each wire as you go so you know exactly where it leads. This will save time during setup and troubleshooting later. For a neat look, tuck cables behind walls or use cable covers. Clean wiring not only improves safety but also keeps your installation looking polished.
Step 4: Connect The Power Supply
Your Aiphone intercom requires a power source. Plug the transformer into a nearby outlet and connect it to the master station following the wiring diagram in the manual.
Before powering on, double-check all connections to make sure they are secure and insulated. This extra step helps prevent shorts or malfunctions when you flip the switch.
Step 5: Install Door Station (If Applicable)
If your system includes a door station, mount it near the main entry at a height where visitors can easily reach it. Make sure the area is well-lit and visible.
Connect the door station wires to the master station, following the guide provided with your intercom kit. Because this unit is exposed to weather, take extra care to seal edges and use weatherproof covers. Proper sealing ensures the station will last longer and continue working in different conditions.
Step 6: Add Sub-Stations
Sub-stations let you expand the system to multiple rooms. Choose convenient spots, such as bedrooms, kitchens, or offices, where communication is most useful.
Connect each sub-station to the master unit, and test them one at a time to confirm they work properly. For offices, consider placing units near desks or meeting rooms for smooth communication. For homes, high-traffic areas usually work best.
Step 7: Test The System
With everything connected, it’s time to test. Power on the intercom and check both audio and video quality (if using a video model). Call between stations to confirm they connect smoothly.
If you notice static, low volume, or a blank screen, review the wiring first. Loose or mislabeled wires are often the cause. If the issue continues, consult the troubleshooting section of your Aiphone manual or consider professional support.
By following these steps, you can install an Aiphone intercom system safely and effectively without needing advanced technical skills. Careful planning, neat wiring, and thorough testing will ensure your intercom works flawlessly and provides reliable communication for years to come.
Tips For Smooth Installation
Installing an Aiphone intercom is straightforward if you prepare properly and follow each step carefully. Beyond the basic wiring and mounting, small details can make a big difference in ensuring your system works reliably and looks professional. Below are practical tips that help avoid common mistakes and save you time during setup.
- Take Photos Of Wiring Before Connecting
Before you begin attaching wires to the intercom system, take clear photos of the wiring layout. These images act as a reference in case you need to troubleshoot later or reconnect anything. Many homeowners skip this step and end up confused when connections don’t work as expected. A quick snapshot with your phone can prevent hours of frustration. - Use Cable Clips To Keep Wiring Neat
Messy wiring not only looks unprofessional but can also lead to unnecessary strain on cables and potential signal issues. Using cable clips keeps everything organized and prevents wires from tangling or sagging. This small effort adds a polished finish to your installation and makes future maintenance easier. - Always Double-Check Connections Before Powering On
It’s tempting to switch on the system right away, but taking a few extra minutes to review your connections is essential. Loose wires or incorrect placements can cause the intercom to malfunction or, in some cases, damage the unit. Double-checking ensures you power on with confidence, knowing every connection is secure. - Don’t Skip The User Manual—Brand-Specific Details Matter
While general installation steps apply across intercoms, each Aiphone model may have unique requirements. The user manual includes critical details about wiring, mounting, and power connections that you won’t find elsewhere. Skipping this guide often leads to errors that could have been avoided. Reading and following brand-specific instructions ensures your system operates as intended.
By following these practical tips, you not only make the installation process smoother but also improve the long-term reliability of your Aiphone intercom. Taking a little extra care now means you’ll enjoy clear communication and a secure setup for years to come.
When To Hire A Professional
While many Aiphone intercom systems are designed with the do-it-yourself homeowner in mind, there are situations where calling in a licensed professional is the smartest move. Attempting to take on a job that is beyond your comfort level can lead to wiring mistakes, safety hazards, or even system malfunctions. Below are key scenarios where expert help is highly recommended.
Complex Wiring Setup
If your home or building has older wiring, multiple circuits, or a non-standard electrical layout, professional installation is often the safest choice. Electricians and security system installers have the experience to navigate these complexities, ensuring that your Aiphone intercom is connected correctly and functions without interference. They can also identify potential issues before they become costly problems.
Uncomfortable With Electrical Work
Not everyone feels confident working with electrical components, and that’s perfectly fine. Handling wires, breakers, and power supplies carries risks if you’re unsure of the proper procedures. Hiring a trained technician removes the stress and guarantees that your system will be installed to meet safety standards. Peace of mind is worth the investment.
Multi-Unit Buildings Or Commercial Installs
Large-scale installations, such as apartment complexes, office buildings, or gated communities, often require advanced planning and specialized knowledge. These setups involve multiple stations, central control units, and more intricate wiring. A professional installer can design a system that scales properly, integrates with other security solutions, and complies with local regulations.
Knowing when to hire a professional can save you time, money, and potential headaches. If you’re unsure about your wiring, uneasy with electrical work, or managing a larger installation, bringing in expert help ensures that your Aiphone intercom system works smoothly and safely for years to come.
Maintenance And Troubleshooting
Keeping your Aiphone intercom in good condition ensures it works reliably for years. Just like any other device in your home, regular care and quick fixes can prevent small issues from turning into bigger problems.
Routine Cleaning
Over time, dust and dirt can collect on your intercom. Wipe the camera lens with a soft microfiber cloth to keep the video feed clear. Clean the speaker grills gently with a dry brush or compressed air so that sound remains crisp. For wall stations, use a slightly damp cloth to remove fingerprints and smudges without damaging the surface. Consistent cleaning keeps both the look and performance of your Aiphone system at its best.
Software Or Firmware Updates
If you own a smart Aiphone model that connects to Wi-Fi or integrates with apps, check regularly for software or firmware updates. These updates often fix bugs, improve performance, and add security enhancements. Most systems will notify you through the companion app or display, but it’s a good habit to check the manufacturer’s website every few months. Staying updated ensures your intercom remains secure and functional.
Common Fixes For Everyday Issues
- No Power: First, make sure the power supply is connected and the outlet is working. Replace or reset the transformer if necessary.
- Weak Audio: This can be caused by loose wiring or a blocked speaker grill. Double-check the connections and clean the speaker area.
- Blurry Video: Wipe the lens carefully and check for adequate lighting near the door station. If the image is still unclear, inspect the wiring and connections to the camera.
How To Reset The System
Sometimes a simple reset solves unexpected glitches. Most Aiphone intercoms have a reset button or a process listed in the manual. Typically, this involves holding the reset button for several seconds until the system reboots. A reset clears temporary errors without affecting your saved settings, but always confirm the procedure for your specific model before proceeding.
A little maintenance goes a long way in keeping your Aiphone intercom reliable. By cleaning it regularly, staying current with updates, and knowing quick fixes, you can avoid downtime and enjoy clear communication and security whenever you need it.
Ready to make your property more secure and connected? Discover more practical guides, expert tips, and trusted solutions by visiting us today.
FAQs: About How to Install Aiphone Intercom
- What tools do I need to install an Aiphone intercom?
You’ll need a drill, screwdriver, level, wiring tools, mounting hardware, and the Aiphone intercom kit with power supply. - Can I install an Aiphone intercom by myself?
Yes, most homeowners can install it with basic tools, but if the wiring is complex or electrical work is involved, hiring a professional is safer. - How long does it take to install an Aiphone intercom?
A basic installation usually takes 2 to 4 hours, depending on the number of stations and the complexity of your wiring setup. - Do I need special wiring for an Aiphone intercom?
Many Aiphone systems use standard low-voltage wiring, but always check the manual for specific requirements before starting installation. - Where should I mount the master station?
Place it at a convenient height, usually around eye level, in a central spot where it’s easy to see and access. - How do I connect the power supply for my intercom?
The power transformer is typically plugged into a nearby outlet and connected to the master station using the recommended wiring. - What’s the difference between audio-only and video Aiphone intercoms?
Audio-only models allow voice communication, while video models include a camera and screen for added security and visual confirmation. - How do I test my Aiphone intercom after installation?
Power on the system, check each station for audio clarity, and if it’s a video model, confirm the camera feed is clear. - How can I fix static or poor sound quality?
Ensure all wiring connections are tight, check for interference from other electronics, and clean the microphone and speaker areas. - When should I call a professional for installation?
If you encounter complicated wiring, electrical safety concerns, or if the system is for a commercial building, it’s best to hire an expert.
Conclusion
Installing an Aiphone intercom is a task most homeowners can handle with the right tools, patience, and a clear step-by-step plan, making it easier than many people expect. Beyond the straightforward setup process, the real value comes from the benefits—better communication between rooms, improved convenience, and an extra layer of security for your home or office. While a DIY installation saves money and gives you full control, there is no harm in calling a professional if you run into wiring challenges or prefer expert help for peace of mind. Now that you know how to install an Aiphone intercom, you can take the first step toward creating a safer, more connected living space.