
Yes, a competent DIYer or property owner can install most electric strikes, provided you choose the correct fail mode and respect frame restrictions. This is a mechanical and low-voltage task that rewards patience and precise measurement far more than raw skill. Three things determine whether your install succeeds: picking a strike and fail mode that match your lockset and code requirements, verifying the frame and latchbolt are actually compatible before you drill anything, and wiring the unit to a correctly sized access-control power supply that you then test under real conditions.
Here’s what to lock in before you touch a screwdriver:
- Pick compatible hardware and fail mode. Match the strike to your lockset type and confirm whether the door needs fail-safe or fail-secure operation.
- Verify frame and lock prep. Measure the latchbolt throw, backset, and frame rabbet before ordering parts, not after.
- Wire to a properly sized power supply and test. Undersized supplies cause the buzzing and intermittent release problems that generate most service calls.
One hard stop applies regardless of your skill level: never field-cut a fire-rated frame. If the door is fire-rated or sits on a required egress path, the strike must meet NFPA 80 and ANSI/BHMA listing requirements, and any frame prep needs to happen at the factory, not on a jobsite ladder. When in doubt, YDA Security Systems NYC handles exactly this kind of code-sensitive install across the boroughs we serve.
Table of Contents
- Door Strike Installation Basics: How Electric Strikes Work
- What Tools and Materials Do You Need?
- How Do You Choose the Right Strike for Your Door?
- Preparing the Door and Frame Correctly
- Step-by-Step Installation for a Cut-In Electric Strike
- No-Cut and Surface-Mount Options When You Can’t Cut the Frame
- Wiring Basics: Power Supplies, Relays, and Safe Connections
- How to Test and Commission the Installed Strike
- Common Door Strike Problems and How to Fix Them
- Code, Safety, and When to Hire a Licensed Installer
- Key Takeaways for Your Door Strike Project
- When It’s Time to Call YDA Security Systems NYC
- Sources
- FAQ
Door Strike Installation Basics: How Electric Strikes Work
An electric strike’s job is simple to state and easy to get wrong in practice: the keeper captures or releases the latchbolt under electrical control. That single mechanical relationship, between a pivoting jaw and a spring-loaded bolt, is the functional core of every strike on the market, from a basic buzzer-entry setup to a networked access-control door.
Inside the housing you’ll find a few consistent parts. The keeper is the pivoting jaw that either blocks or swings free to let the latchbolt pass. A solenoid or motor drive moves that keeper on command. The faceplate covers the assembly and matches the frame’s finish, and many commercial units add monitoring contacts that report door and latch status back to an access-control panel.

Where installs go wrong most often isn’t the mechanics. It’s fail-mode selection.
Fail-safe strikes (wired normally open, or NO) unlock when power is cut. Fail-secure strikes (wired normally closed, or NC) stay locked when power drops. According to Schlage’s fail-safe versus fail-secure guidance, fire-rated doors require fail-secure hardware, because the door must maintain positive latching during a power outage rather than swing open and let smoke or flame spread. Get this backward on a stairwell door and you’ve created a code violation, not just an inconvenience.
| Fail mode | Power behavior | Typical use | Fire-door suitable? |
|---|---|---|---|
| Fail-safe (NO) | Unlocks when power is removed | Egress-critical doors, some interior offices | No |
| Fail-secure (NC) | Stays locked when power is removed | Fire-rated doors, exterior entries, high-security rooms | Yes |
Electric strikes are jamb-mounted, which is what makes them the easiest device to retrofit. The mechanical lockset stays untouched, so you’re only replacing the strike plate itself, not the whole lock body.
What Tools and Materials Do You Need?
Gather the right tools and a verified strike model before you touch the door or frame. Half of what goes wrong on a DIY strike job traces back to buying hardware before confirming it fits, then improvising with whatever’s in the toolbox.
Your shopping list should include:
- An electric strike unit matched to your latch type and frame (not a “universal” guess)
- Faceplate finish matching existing hardware
- Mounting screws (the manufacturer’s, not generic hardware-store substitutes)
- Drill with sharp bits sized for your frame material
- Chisel or router for cut-in models, if the frame isn’t pre-prepped
- A multimeter and a non-contact voltage tester
- Low-voltage cable rated for the run length
- A 12 VDC or 24 VDC power supply matching the strike’s spec
- A relay or decoder if your access-control setup requires one
- Wire nuts or terminal blocks, plus a junction box or frame access point
Don’t skip the safety basics: safety glasses, gloves, a stepladder if the strike sits above reach, and a lockout/tagout habit anytime you’re working near an existing power source. A non-contact voltage tester takes ten seconds and prevents the one mistake that actually hurts.
Pro Tip: Bring the old strike to the hardware counter, or at minimum photograph the frame cutout and latchbolt before you buy anything. A strike that looks similar online can have a different keeper angle or throw depth that won’t seat correctly once installed.
If you’re unsure whether a part will fit, a technician from our locksmith and door hardware team can confirm compatibility on-site before you commit to a purchase.
How Do You Choose the Right Strike for Your Door?
Compatibility between the strike, the latchbolt type, the throw distance, and the frame prep is the single make-or-break variable in this entire project. Get this right and installation is straightforward. Get it wrong and no amount of adjusting will make the keeper and latchbolt cooperate.
Work through this checklist before ordering:
- Confirm latchbolt projection (many cylindrical locksets throw around 5/8 inch, but verify yours)
- Identify lockset type: cylindrical or mortise, since strikes are built for one or the other
- Note door handing (left or right swing) and frame material (hollow metal versus wood)
- Check for a fire rating on the door or frame, which limits your strike options to fail-secure, factory-prepped units
Measurement matters more than most DIYers expect. Locate the latch centerline, measure the backset from the door’s edge to the latch axis, and check the frame rabbet depth against the strike’s spec sheet. A quarter-inch discrepancy in rabbet depth is enough to leave the keeper sitting at the wrong angle relative to the latchbolt.
- Measure your existing strike opening and latchbolt throw first.
- Cross-check those numbers against the manufacturer’s template for your chosen strike.
- Confirm the fire rating and fail-mode requirement before you finalize the order.
The HES 8000/8300 Series is worth knowing by name here, because it’s built around a no-cut design with internal ramps rather than a traditional pocket. That geometry only works when the latchbolt sits close to a 40 to 45 degree angle against the ramp, which means a twisted or out-of-plumb frame will cause problems even with hardware designed to skip the cutting step. Von Duprin guidance echoes the same warning from a different angle: keeper engagement has to match your specific latchbolt, and manufacturers consistently point to compatibility mismatches as the leading cause of installation failure, not wiring or power issues. Camden Door Controls hardware follows the same rule of thumb: check the spec sheet’s throw and backset figures against your actual door before you buy, not after.
A universal strike fails when the keeper can’t fully capture the latchbolt at rest, or when it captures the bolt but binds under the spring tension needed for smooth release. You’ll usually spot this during a dry fit, before any wiring, if you take the time to test it.
If your door uses a locking system that ASSA Abloy or Schlage manufactures, our Schlage door hardware page covers compatible strike options for those lock bodies specifically.
Preparing the Door and Frame Correctly
Accurate measuring and marking prevent the misalignment problems that cause a strike to catch, buzz, or simply fail to latch reliably. This step takes fifteen minutes if you’re careful and can cost you a full afternoon of troubleshooting if you rush it.
- Use the manufacturer’s paper or plastic template rather than eyeballing dimensions from the old strike.
- Measure the latch centerline from the floor and transfer that measurement to the new location.
- Mark both vertical and horizontal centerlines on the frame before drilling or cutting anything.
- Close the door and check where the latchbolt naturally lands to confirm your marked centerline matches the real engagement point.
A carpenter’s square is your best friend here. Hold it against the frame and the door edge simultaneously to check for twist. A frame that’s out of plumb by even a small margin will throw off keeper-to-latch alignment even when your measurements are technically correct on paper.
Pro Tip: Most electric strikes include a vertical adjustment slot or shim allowance built into the mounting plate. Use it to compensate for minor frame irregularities instead of reaching for a router to widen the cutout, which you can’t undo once you’ve made the cut.
One rule has no workaround: fire-rated frames require factory prep, not field modification. If you cut into a fire-rated frame yourself, you void the fire label on that assembly, full stop. Order the correct factory-prepped frame or strike combination instead.
Step-by-Step Installation for a Cut-In Electric Strike
Follow this sequence in order and verify measurements at each critical point before you drill, cut, or fasten anything permanently.
- Remove the existing strike plate and any leftover hardware from the frame.
- Verify the frame prep and cutout clearances match your new strike’s template exactly.
- Dry-fit the strike without fasteners and mark the screw hole locations.
- Route low-voltage cable through the frame’s access point or an existing junction box, leaving a service loop of extra slack.
- Mount the strike using the manufacturer’s fasteners, not substitutes, since screw length affects how flush the faceplate sits.
- Adjust the keeper if your model includes that feature, correcting for any minor frame twist you noted earlier.
- Reattach the door trim and test latch engagement with the door closed under normal conditions.
When you’re routing wire, keep your low-voltage cable physically separate from any mains wiring nearby, terminate connections inside an accessible junction box rather than a wire-nut splice buried in the frame, and follow the strike’s polarity notes if it’s a DC model. Reversing polarity on some units causes intermittent operation that looks like a mechanical fault but is actually electrical.
For no-cut ramp designs like the HES 8000/8300, confirm the latchbolt sits at roughly a 40 to 45 degree angle against the internal ramp before you consider the mechanical install finished. Perform a latchbolt push test and a deadlatch drop test right here, during installation, rather than waiting until everything is buttoned up.
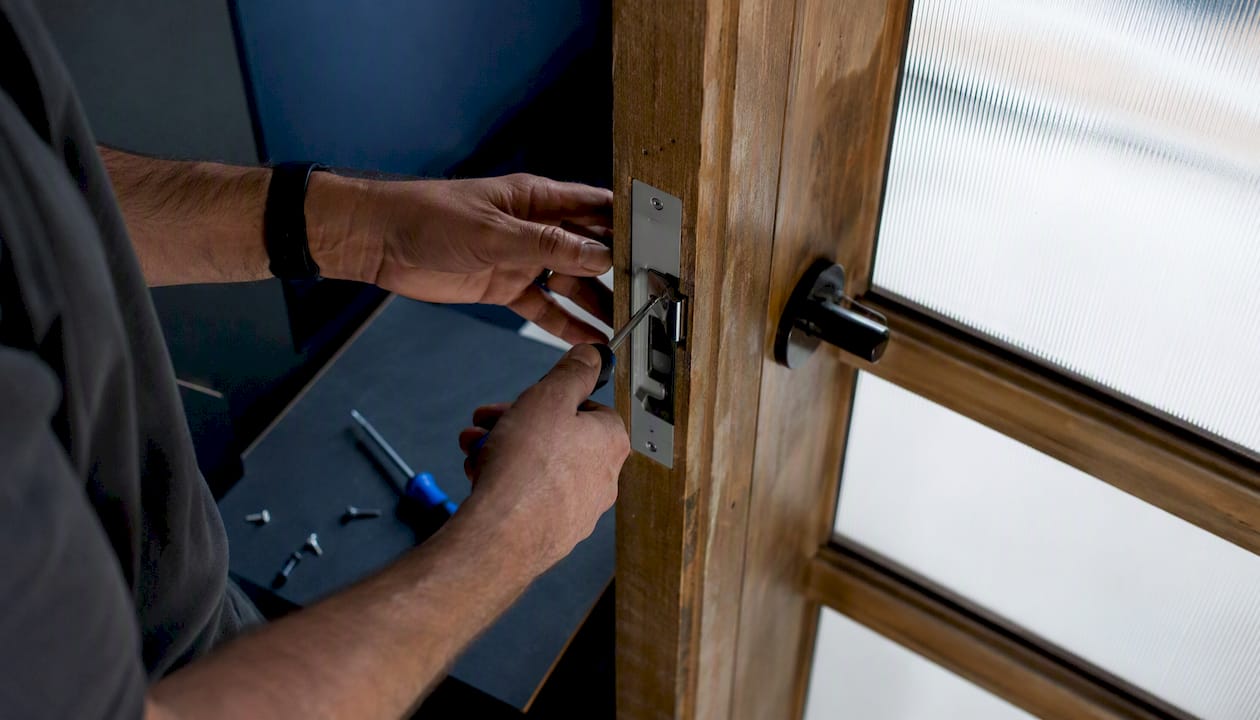
Pro Tip: Isolate any nearby mains circuits before working close to electrical hardware, and always size your access-control power supply for the strike’s inrush current, not just its steady-state draw. Undersized supplies are the number one cause of “works sometimes” complaints we hear on service calls.
No-Cut and Surface-Mount Options When You Can’t Cut the Frame
You can often avoid cutting a frame entirely by choosing a no-cut strike or a surface-mounted alternative, though each comes with trade-offs in appearance, strength, and cost that are worth understanding before you buy.
The HES 8000/8300 Series is the clearest example of a no-cut approach. Its internal ramp geometry lets the latchbolt engage without a traditional mortised pocket, which preserves the frame’s fire label and saves significant install time on existing openings. The trade-off is precision: ramp-style strikes are sensitive to latchbolt angle and frame plumb in a way that traditional cut-in units aren’t.
| Installation type | Frame compatibility | Fire-rating compatible | Appearance | Retrofit difficulty |
|---|---|---|---|---|
| Cut-in strike | Hollow metal, wood (with prep) | Yes, with factory prep | Flush, cleanest look | Moderate to high |
| No-cut strike (ramp design) | Most existing frames | Yes, preserves label | Slightly visible ramp housing | Low |
| Surface mount | Any frame, including glass/aluminum | Limited | Visible box on frame face | Low |
Even a no-cut unit sometimes needs shims or small door adjustments to get keeper-to-latch engagement right, so don’t assume “no-cut” means “no adjustment.” Verify the fit against your actual latchbolt before finalizing the purchase.
If your project is weighing an electric strike against a magnetic lock for a commercial entry, our comparison of magnetic locks versus electric strikes walks through when each makes more sense for your specific door and traffic pattern.
Wiring Basics: Power Supplies, Relays, and Safe Connections
Most commercial electric strikes commonly run on 12 VDC, though some models accept 24 VDC, and matching the power supply to the strike’s exact spec is essential. Guess wrong here and you’ll get a strike that works during testing and fails intermittently once it’s in daily use.
Your wiring checklist:
- Use the correct wire gauge for your cable run length; longer runs need heavier gauge to avoid voltage drop.
- Route cable through the frame or conduit rather than leaving it exposed.
- Terminate connections inside a frame-accessible junction box.
- Observe polarity carefully on DC models, since reversed polarity causes erratic release.
Here’s the detail most DIY guides skip: strikes typically draw a high inrush current for a 300 to 600 millisecond release pulse, then settle into a much lower holding current. Your power supply has to handle that peak draw, not just the average, and it should include short-circuit protection. For any door where security actually matters, add battery backup so the strike keeps functioning through a brief outage.
If you’re wiring through a relay, put the relay contact in series with the strike’s power feed, and wire any exit-request button in parallel so it can trigger release independently. Dwell time, how long the strike stays unlocked after activation, is usually set to a few seconds and should be adjusted based on foot traffic and door closer speed.
Keep low-voltage wiring physically separated from mains circuits per standard electrical practice, and never splice strike wiring into an unverified power source. For readers integrating a strike into a larger access-control panel, our access control installation service and Seco-Larm access control systems page cover the panel side of this wiring in more depth.
How to Test and Commission the Installed Strike
Testing after installation isn’t optional; it’s the step that separates a strike that works today from one that works reliably for years. Run both mechanical and electrical checks, and specifically verify the fail mode by simulating a power loss.
- Perform a latchbolt push test: apply force at roughly a 45 degree angle to the latchbolt and confirm smooth retraction.
- Run a deadlatch drop test to confirm the deadlatch returns to position without catching.
- Cycle the door open and closed 50 to 100 times to shake out any intermittent binding.
- Verify dwell time matches your intended setting.
- Check any monitoring contacts if your unit reports status to a panel.
- Confirm free egress from the inside under all power conditions, including a simulated outage.
Your acceptance criteria are straightforward: the keeper must fully capture the latchbolt when locked and release cleanly on activation, with no catching or buzzing during normal operation, and supply voltage should stay within spec during the release pulse.
- Leave a labeled service loop of extra wire at the junction box.
- Record your wiring connections somewhere you’ll actually find them later.
- Schedule an annual inspection, or sooner if the door sees heavy daily traffic.
Common Door Strike Problems and How to Fix Them
Most problems trace back to one of three root causes: mechanical misalignment, an undersized power supply, or the wrong fail mode selected for the application. Chasing symptoms instead of the underlying cause is why the same issue keeps coming back after a quick fix.
- Misalignment or catching: remeasure the latch centerline, add a shim, or adjust the keeper’s vertical position.
- Catching specifically on ramp-style units: rerun the latchbolt push test and deadlatch drop test, then re-seat or angle-adjust the strike.
- Buzzing or inconsistent release: check supply voltage under actual load; an undersized power supply that reads fine at idle often sags below spec during the release pulse.
- Strike not releasing at all: verify wiring polarity, check the relay logic, and confirm the control signal is actually reaching the strike.
Pro Tip: If you’ve corrected alignment and power sizing and the problem persists, contact the manufacturer’s technical support line before replacing the whole unit. HES and similar manufacturers maintain troubleshooting guides specific to their ramp geometry that resolve issues generic advice won’t catch.
Call a licensed professional when you’re dealing with a fire-rated assembly, when the same failure keeps recurring after adjustment, when the latchbolt itself is damaged, or when the fix would require touching mains wiring.
Code, Safety, and When to Hire a Licensed Installer
If the door or frame is fire-rated, or it’s part of a required egress path, this isn’t a DIY project. Fire-rated doors require fail-secure strikes for positive latching, and field-cutting a fire-rated frame voids the fire label outright, regardless of how clean the cut looks.
NFPA 80 and ANSI/BHMA listing requirements govern electric strikes on fire-rated assemblies, and your local Authority Having Jurisdiction may layer additional rules on top of the baseline code. For a deeper look at how these code requirements apply to building operations generally, this fire protection code overview for building managers is a useful reference point.
The most common reason an electric strike installation fails isn’t a bad part or bad wiring. It’s a mismatch between the strike, the lockset, and the frame prep that nobody caught before the drill came out.
Hiring a licensed installer buys you more than convenience on complicated jobs:
- Correct fire-listed hardware selection for the specific assembly involved
- Coordination with factory frame prep rather than field guesswork
- Safe, code-compliant low-voltage wiring separated properly from mains
- Warranty-backed installation you can point to if something fails later
- Documentation ready for an AHJ inspection without scrambling beforehand
If you’re coordinating exit hardware alongside a new strike, this panic bar installation guide covers compatibility considerations worth reviewing before finalizing your door hardware plan. For anything involving commercial fire-rated doors or complex access-control wiring, our commercial door hardware and locksmith service team handles the door strike installation basics that go beyond a straightforward residential retrofit.
Key Takeaways for Your Door Strike Project
Correct strike selection, accurate frame measurement, properly sized wiring, and thorough testing determine whether your electric strike installation performs reliably for years.
- Choose a strike and fail mode that match your lockset, door material, and fire-rating status before ordering anything.
- Measure latch centerline, backset, and frame rabbet depth, and confirm compatibility rather than assuming a universal fit.
- Wire to a dedicated, correctly sized power supply, keep low-voltage cable separate from mains, and add battery backup on critical doors.
- Run the full test sequence, including the latchbolt push test and deadlatch drop test, and consult your local AHJ or hire a licensed installer for any fire-rated assembly.
YDA Security Systems NYC provides installation and inspection services across Manhattan, Brooklyn, Queens, and Staten Island for property owners who want a professional’s eyes on the job before or after a DIY attempt.
Manufacturer Docs, Standards, and Reference Links
Generic dimensions from a blog post aren’t a substitute for the manufacturer’s own template and wiring diagram. Before you order parts, check:
- HES 8000/8300 troubleshooting guide for no-cut ramp installations and testing steps
- HDWR’s installation manual and FAQ for power-supply sizing and inrush current specs
- SDC’s electric strike overview for general device selection and listing requirements
- CDF Distributors’ installation guide for factory frame prep and fire-rated door rules
Every strike model has its own template dimensions and wiring diagram. Use the one that ships with your specific unit, not a generic diagram from a different manufacturer’s product line.
When It’s Time to Call YDA Security Systems NYC
Not every door is a good DIY candidate, and that’s a fact worth respecting rather than fighting. If your property involves fire-rated assemblies, integrated access-control panels, or a door that’s already failed a previous install attempt, a professional eliminates the guesswork entirely. YDA Security Systems NYC installs and services electric strikes, magnetic locks, intercoms, and full access-control systems across Manhattan, Brooklyn, Queens, and Staten Island, with licensed and insured technicians who handle the frame prep, wiring, and code compliance in a single visit.
This matters most for commercial properties, hotels, and multi-unit buildings where a failed strike isn’t just an inconvenience, it’s a liability. Our team has installed and repaired hardware for thousands of NYC properties, backed by a one-year warranty on every installation. If your building includes guest-facing entries, our security systems for hotels page covers how access control and strikes fit into a broader property security plan.
If you’d rather have a technician confirm compatibility, handle the wiring, and leave you with inspection-ready documentation, reach out through our residential door hardware and locksmith services page to schedule an assessment for your property.
Sources
- Electric Strikes
- HES 8000/8300 Troubleshooting Guide
- HDWR Electric Strikes — Installation Manual & FAQ
- Electric Strike Installation Guide | CDF Distributors
- Von Duprin electric strikes resources
FAQ
How Do You Install a Door Strike?
Remove the old strike, verify the frame prep matches your new unit’s template, dry-fit and mark screw holes, route low-voltage wiring to a junction box, mount with the manufacturer’s fasteners, adjust the keeper, and test the latchbolt push and deadlatch drop before closing up the trim.
What Are the Most Common Problems With Door Strikes?
Misalignment causing catching, buzzing from an undersized power supply, and strikes that fail to release due to wiring or polarity errors account for most service calls; each traces back to a compatibility, measurement, or power-sizing mistake made during installation.
How Should a Door Latch Be Installed?
The latchbolt needs to align with the strike’s keeper at the correct angle, typically close to 40 to 45 degrees for ramp-style no-cut designs, with the centerline measured and marked against the manufacturer’s template rather than estimated by eye.
Which Way Does the Strike Plate Go?
The strike plate mounts on the frame opposite the hinges, oriented so the keeper or opening faces the latchbolt when the door is closed; the beveled or ramped edge of the keeper should face the direction the latchbolt travels as the door swings shut.
Recommended
- Electric Strike Vs Maglock: Key Differences, Pros and Cons – YDA Security Systems NYC
- Schlage Door Hardware Security – YDA Security Systems NYC
- Magnetic Lock vs. Electric Strike: Which Is Best for Your Business? – YDA Security Systems NYC
- Smart Door Security Solutions by Trusted Security Door Contractor – YDA Security Systems NYC