A camera blind spot is any area within a property’s supposed surveillance zone that a camera cannot actually record, usually caused by mounting height, obstructions, or a mismatched lens. The fastest way to find them is a walk test: watch live feeds while someone walks the property, and mark every point where they vanish. Fix what you find by repositioning cameras for overlap, adding a dedicated unit where identification matters most, or bringing in a licensed installer for a full coverage audit.
TL;DR:
- Most common blind spots occur directly beneath fixed cameras, especially in corners, behind pillars, or at transitions between indoor and outdoor zones.
- Proper camera placement requires mapping the field of view in elevation, not just on a flat plan, and performing walk tests at day and night to identify actual gaps.
- Repositioning existing cameras or adding a second dedicated unit at choke points typically fixes blind spots more cost-effectively than equipment upgrades.
- Camera type, lens choice, mounting height, and obstructions directly influence the size and location of blind spots, with taller mounts often requiring more coverage overlap.
- Professional audits provide comprehensive coverage mapping, formal acceptance testing, and a tailored remediation plan, especially for complex properties.
Table of Contents
- Where Camera Blind Spots Usually Show Up
- What Actually Causes Blind Spots?
- How to Find Blind Spots on Your Property
- Fixing Blind Spots: Placement, Overlap, and Camera Types
- Acceptance Testing: Proving the Fix Actually Worked
- When to Bring in a Professional
- What It Costs to Close a Blind Spot
- What to Check Before You Buy a New Surveillance System
- Camera Placement, Privacy, and Local Rules
- Get a Professional Blind-Spot Audit From YDA Security Systems NYC
- Sources
- FAQ
Where Camera Blind Spots Usually Show Up
Most gaps in surveillance coverage aren’t random. They cluster in the same predictable spots on almost every property we inspect across Manhattan, Brooklyn, Queens, and Staten Island.
The most common offender sits directly beneath the camera itself. Every fixed camera has a blind cone at its base, a zone the lens physically cannot angle down into without losing its wider field of view. Someone standing at the base of a wall-mounted unit, right under a doorway camera, is often invisible on the recording even though the camera looks like it’s covering the entrance.
Beyond the blind cone, watch for these recurring trouble spots:
- Corners, returns, and recessed doorways where a straight-line lens can’t bend around a wall.
- Behind structural pillars, shelving units, parked vehicles, or mature landscaping that block the frustum, the 3D wedge of space a lens actually sees.
- Gaps between two adjacent cameras that were never adjusted for overlap, leaving a thin uncovered strip between their fields of view.
- Transition zones between indoor and outdoor cameras, where a change in lighting or lens type creates a seam neither unit fully covers.
Retail stockrooms and parking garages are especially prone to the shelving and pillar problem, while townhouses and walk-up apartment buildings tend to lose coverage at stairwell landings and vestibule doors. Common blind spots also emerge around corners and behind obstacles at night, when reduced visibility compounds an already tight field of view. If you’re mapping a new system from scratch, our security camera placement guide walks through positioning before you drill a single hole.
What Actually Causes Blind Spots?
Blind spots aren’t bad luck. They’re almost always the result of a specific geometric or technical decision made during planning, and once you understand the mechanics, they’re much easier to prevent.
Lens choice and sensor format set the outer limits of what a camera can see. A wide-angle lens covers more ground but sacrifices detail at distance, while a narrow, longer focal length gets you identification quality at range but misses everything outside that narrow corridor. Pick the wrong one for the space and you’ve built a permanent gap into the design before the camera is even mounted.
Mounting geometry causes just as much trouble. A camera’s field of view is really a three-dimensional frustum, and walls, pillars, and shelving cut directly into that volume, which is why professionals map coverage in elevation, not just a flat circle on a floor plan. Height compounds this: mounting a camera higher can widen its reach but also grows the blind cone directly beneath it, requiring additional coverage to protect the near field. As CCTVplanner’s geometry analysis puts it, height and tilt are always a trade, not a free upgrade, and taller mounts often need a second camera to protect the near field they just gave up.
A few other causes round out the list:
- Obstructions that move seasonally, like foliage that fills in by summer or delivery pallets stacked near an entrance.
- IR range limitations that leave a camera “seeing” fine by day but going dark past a certain distance at night.
- Assuming a 360° or PTZ camera solves everything, when in practice a fisheye still has dead zones at its extreme edges and a PTZ can only watch one direction at a time.
How to Find Blind Spots on Your Property
Guessing where coverage fails almost always underestimates the problem. A structured process, done once before installation and again after, catches gaps that are invisible from a monitor screen alone.
Start with floor-plan FOV mapping. Before a single camera goes on the wall, sketch each unit’s field-of-view cone directly onto a scaled floor plan, including height and tilt. This is the step most DIY installs skip, and it’s the single biggest predictor of whether a system will have blind spots on day one. A basic FOV calculator that factors in focal length and sensor size will estimate your coverage distance and footprint before you commit to a mounting position.
Once the plan is drawn, run the walk test. This is the same method security consultants use to verify real-world coverage: one person walks the planned routes while a second monitors the live feed and notes exactly where the walker disappears.
- Assign roles. One person walks, one person watches the monitor or app feed, and a third (if available) takes notes and photos.
- Follow a perimeter-then-grid route. Walk the outer boundary first, then cut through the interior in a grid pattern, hitting every doorway, stairwell, and blind corner.
- Repeat at different light levels. Daytime coverage tells you almost nothing about nighttime performance, since IR range is often shorter than the visible daytime range.
- Mark every disappearance point on the floor plan with a timestamp, so you can cross-reference it against the recorded clip later.
- Pull the recorded clip, not just the live view. A feed can look fine live while the actual saved footage has a gap in the export or a retention setting that trims the start of the clip.
Bring a few basic tools along: a laser tape measure for accurate distances, a temporary mount or clamp so you can trial a position before committing to permanent hardware, and a simple checklist for IR range verification after dark.
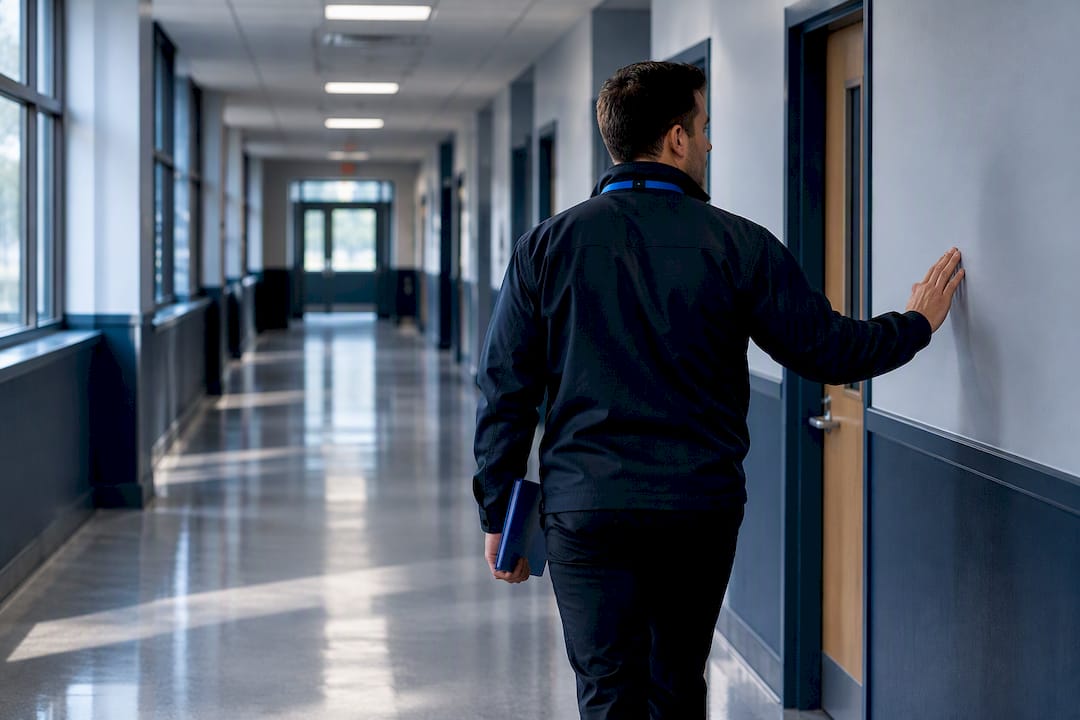
Pro Tip: Walk the same route twice, once at normal pace and once slower, dragging a hand along walls at chest height. Slow walkers and anyone hugging a wall are exactly the behavior a blind spot hides, and testing only at normal walking speed misses it.
Keep a running blind-spot list and a camera register (make, model, mounting height, tilt angle, lens type) as you go. That documentation becomes the backbone of any remediation plan, whether you’re fixing it yourself or handing it to an installer.
Fixing Blind Spots: Placement, Overlap, and Camera Types
Once you know where the gaps are, the fix usually comes down to one of five moves, roughly in order of cost.
Reposition before you buy anything new. Adjusting an existing camera’s angle or height, even by a few inches, often closes a gap for free. That overlap isn’t wasted redundancy; it’s what prevents the thin blind strip that forms right where two coverage zones are supposed to meet but don’t quite touch. Systematic floor-plan analysis paired with deliberate overlap is consistently the most effective low-cost fix available, and it’s the first thing worth checking before spending on new hardware.
For open areas like courtyards, lobbies, or loading docks, a triangulated layout, three cameras positioned at the corners of a triangle and angled toward the center, closes flank blind zones more efficiently than lining cameras up in a straight row.
Add a dedicated identification camera when a wide view isn’t enough. A single wide-angle unit at an entrance gives you context, but it rarely gives you a usable face or license plate at distance. Pairing a wide approach camera with a second, narrower unit aimed at the choke point (a doorway, a gate, a register) balances situational awareness with actual identification quality.
Camera type matters here too:
- Wide-angle cameras cover large open areas well but lose detail past 20 to 30 feet.
- Dual-lens or panoramic cameras cover more ground per unit but can soften resolution at the seams between lenses.
- PTZ (pan-tilt-zoom) cameras are excellent for large lots and active monitoring, but they only watch one direction at a time unless paired with a fixed camera for full-time coverage.
- 360-degree fisheye cameras eliminate corner blind spots in a single room but still distort and lose detail at the extreme edges of the frame.
Match focal length to your actual coverage distance and the identification range you need. A parking garage entry gate needs a longer, narrower lens than a stockroom aisle five feet wide.
Pro Tip: If you’re only fixing one blind spot on a budget, fix the one nearest your main entry or cash register first. That’s the highest-value few square feet on most commercial properties, and it’s usually the cheapest gap to close with a single repositioned or added camera.
Nighttime coverage deserves its own pass. Confirm your infrared range actually reaches as far as the camera claims on the box, since manufacturer-rated IR distance is frequently optimistic compared to real-world performance. Add a dedicated IR illuminator or controlled exterior lighting where range falls short, and lean toward WDR or HDR-capable cameras for any entrance that faces bright exterior light during the day and near darkness at night. Our security camera features checklist breaks down which specs actually matter when you’re comparing units for this kind of mixed-light entrance.
Acceptance Testing: Proving the Fix Actually Worked
A blind spot fix isn’t done until it’s tested and documented. A 60-minute acceptance test, run once after any repositioning or new installation, confirms the gap is actually closed rather than just theoretically improved.
- Verify the floor plan matches reality. Confirm every camera on the plan is mounted where the plan says it is, at the height and tilt recorded.
- Check the camera register. Model, lens, mounting height, and IR rating should all be current and accurate.
- Re-walk the blind-spot list. Every previously marked gap gets a fresh walk test, day and night.
- Pull recorded clips, not just live view. Confirm the export actually starts before the subject enters frame and ends after they leave.
- Score each item 0 to 2. Zero means the gap is still there, one means partial coverage, two means confirmed clean coverage on both live feed and saved clip.
| Test Item | What to Record | Pass Score |
|---|---|---|
| Daytime identification distance | Distance where a face or plate is readable | 2 = confirmed, 1 = partial, 0 = fail |
| Nighttime IR performance | Actual effective range vs. rated range | 2 = matches spec, 1 = short, 0 = dark |
| Recorded clip export | Start time, end time, exportability | 2 = clean, 1 = trimmed, 0 = missing |
| Blind-spot re-check | Walker visibility at each marked point | 2 = covered, 0 = still blind |
Combining a property map, camera register, blind-spot list, and a day/night test sheet turns a vague “looks fine” into a verifiable record you can hand to insurance, a tenant, or a future installer.
Retest on a schedule, not just once. New landscaping, a renovation that adds a wall or shelving unit, seasonal light changes, and shifting vehicle parking patterns all create new blind spots on properties that passed testing a year earlier.
When to Bring in a Professional
Some layouts are straightforward enough to test and fix yourself. Others aren’t, and knowing the difference saves you from a system that looks complete but has gaps you’ll only discover after an incident.
Multi-story stairwells, retail racking that gets rearranged seasonally, parking garages with support columns every few feet, and any property with a mixed indoor/outdoor perimeter all tend to defeat DIY coverage planning. The geometry gets complicated fast once you’re stacking floors or dealing with reflective surfaces and changing light.
A professional audit typically delivers:
- Floor-plan FOV mapping done in elevation, not just a flat overhead sketch.
- A cross-coverage plan that assigns overlap deliberately rather than by guesswork.
- Formal acceptance testing with day and night results documented in writing.
- A remediation plan ranking which gaps get fixed first based on risk.
Our technicians are licensed and insured, and every installation carries a 1-year warranty. We serve multiple boroughs of New York City, working directly from the coverage-mapping and acceptance-testing process outlined above rather than a rough estimate. That structured approach is also what prevents costly rework, since fixing a blind spot after cabling and mounts are already finalized costs far more than catching it on paper.
What It Costs to Close a Blind Spot
Closing a blind spot rarely means replacing your whole system. Most fixes fall into one of three cost tiers, and knowing which tier you’re in before calling anyone helps you set realistic expectations.
The cheapest fix is repositioning hardware you already own. If a camera just needs a new angle, a lower mount, or a few feet of relocation along the same wall, the cost is almost entirely labor, often bundled into a service visit rather than billed as its own project.
The middle tier is adding one or two cameras to cover a specific gap, like a dedicated unit at a side entrance or a second camera to protect the near field under a high-mounted unit. This is where lens choice matters for cost control: a longer-range lens covering more distance from one mount point can sometimes eliminate the need for a second camera entirely.
The highest tier involves upgrading equipment categories rather than adding units, swapping a standard fixed camera for a PTZ to cover a large lot, or adding dedicated IR illuminators and WDR-capable sensors to fix a chronic nighttime gap. Structured cabling often factors in here too, since a new camera position may need fresh low-voltage wiring run to a spot the original install never anticipated. Property owners tackling a bigger security overhaul alongside blind-spot fixes often bundle in structured cabling and network wiring work at the same time, since running new lines once is cheaper than doing it twice.
Pricing for any of these tiers depends on your specific property, camera count, and whether new wiring is involved, so get a direct quote rather than estimating from a generic per-camera number.
What to Check Before You Buy a New Surveillance System
Buying a new system with blind-spot prevention in mind means asking different questions than most retail buying guides suggest. Resolution and price matter less than whether the system’s design actually matches your property’s geometry.
Ask any installer or manufacturer spec sheet for the camera’s actual field-of-view angle and effective IR range, not just its maximum resolution. A 4K sensor pointed at the wrong angle from the wrong height still produces a blind spot; resolution only helps once coverage geometry is right. Confirm whether the system supports enough camera channels to add units later if your first walk test reveals gaps, since undersized systems force a full upgrade rather than a simple addition.
Check whether the recorder retains footage long enough and exports clips cleanly, since a live view that looks complete can still fail on the recorded side if clip start times or storage settings are misconfigured. For any property with racking, columns, or irregular room shapes, ask specifically how the proposed layout handles those obstructions rather than accepting a generic camera count. A step-by-step installation walkthrough is a useful reference if you’re comparing what a proper install actually involves before signing off on a quote.
Finally, weigh whether you’re buying a system to install yourself or paying for a designed layout. Our home security camera installation guide covers the DIY path in detail, but a professionally mapped layout accounts for blind spots before the first hole is drilled rather than after a walk test reveals them.
Camera Placement, Privacy, and Local Rules
Camera placement decisions carry real privacy and legal weight, not just coverage implications. Cameras aimed into a neighbor’s window, a bathroom, or another clearly private space create both a privacy violation and, in many jurisdictions, legal exposure regardless of how good your intentions were.
New York property owners generally have wide latitude to record common areas, entrances, and their own property lines, but recording strictly private spaces, whether your own bathroom or a neighboring unit’s windows, crosses into legal risk. Commercial properties, particularly those covering employee break rooms or bathrooms, face additional restrictions under state and local privacy statutes. A facility security risk assessment is a useful way to document not just coverage gaps but also whether a given camera angle raises a privacy concern before it becomes a liability.
Signage requirements also vary by property type and municipality, and multi-tenant buildings often need to balance full corridor coverage against tenants’ reasonable expectation of privacy inside their own units. If your blind-spot fix involves adding a camera near a shared hallway, courtyard, or amenity space, it’s worth confirming the angle doesn’t drift into a neighboring unit’s windows or a shared outdoor space where residents expect some privacy, the kind of line-of-sight question that also comes up when positioning cameras across shared courtyards and building facades. When in doubt, angle wider coverage toward shared entry points and away from private windows, and document the reasoning in your camera register.
Get a Professional Blind-Spot Audit From YDA Security Systems NYC
Fixing camera blind spots yourself with a walk test and a few repositioned units works for a lot of straightforward properties. But once you’re dealing with a multi-story building, a retail floor with shifting inventory, or a parking structure full of columns, a DIY walk test can miss gaps that only show up under the exact conditions an incident happens.
YDA Security Systems NYC builds that structured process directly into every installation: a floor-plan coverage map, a documented camera register, and a formal acceptance test before we call the job finished. Every installation carries a 1-year warranty, and our licensed and insured technicians serve properties across Manhattan, Brooklyn, Queens, and Staten Island. If you’re planning a new system or auditing an existing one, our security camera installation service starts with the same mapping and walk-test process outlined above, so the coverage plan is verified before installation, not discovered as a problem afterward.
To request a survey, contact our team through the service page above. Most properties can be scheduled for an on-site assessment within the same week, and commercial clients juggling entry control alongside camera coverage often pair the visit with a look at our intercom and door buzzer installation options for a unified access and surveillance plan.
Sources
For readers who want to run their own coverage math, the CCTV field-of-view calculator estimates distance and footprint from focal length and sensor size. The camera physics and geometry breakdown at CCTVplanner explains height and tilt trade-offs in more technical detail for anyone planning a multi-camera layout from scratch.
- CCTV Field-of-View calculator & tools
- Security cameras mounting location (EMCI Wireless blog)
- Camera physics and blind spot geometry (CCTVplanner)
- How to avoid CCTV blind spots (RoomPlot)
FAQ
What Is a Blind Spot in a Camera?
A blind spot in a camera is any area within the intended coverage zone that the lens physically cannot see, usually caused by the camera’s mounting height, its field-of-view angle, or an obstruction like a wall or pillar. The most common example is the blind cone directly beneath a wall-mounted camera, an area the lens can’t angle down into without losing its wider view.
How Do I Find Blind Spots in My Security System?
Run a walk test: have one person walk the property’s key routes while a second person watches the live feed and marks every point where the walker disappears. Repeat the test at night to catch IR range limitations that daytime testing misses, and always confirm the recorded clip matches what the live view showed.
Do Cars Have Blind Spot Detection Cameras?
Many vehicles from recent model years include blind-spot detection systems that use cameras or radar sensors to warn drivers of vehicles in adjacent lanes, and adoption continues to expand across mainstream trim levels. That’s a distinct system from property surveillance cameras, though both share the same core problem: a fixed sensor position that can’t see everything around it without deliberate design to cover the gaps.
How Much Does It Cost to Fix a Camera Blind Spot?
Cost depends on whether the fix is a simple repositioning of an existing camera, the addition of one dedicated unit, or an equipment upgrade like adding infrared illuminators or a pan-tilt-zoom camera. Quotes for such services generally rely on a direct property assessment rather than a flat rate, since layout and existing wiring both affect the price.
Can a 360-Degree Camera Eliminate All Blind Spots?
A 360-degree or fisheye camera reduces blind spots significantly in a single open room but doesn’t eliminate them entirely, since image quality and detail drop off at the extreme edges of the fisheye distortion. Pairing a wide-view camera with a focused identification camera at key choke points, like an entrance or register, typically closes what the wide unit alone leaves behind.